Mac OS X EZConnect Software
[button link=”https://vpnzoom.com/vpn-setup/osx-connection-client/” color=”black” align=”center” size=”large” style=”flat” fullwidth=”false”]Learn More[/button]We recommend using the EZConnect Connection Manager for accessing our VPN service with your iMac. If you’d like to manually configure OS X the following guide shows how to setup a L2TP VPN connection. If you have any questions about setup please contact our support team.
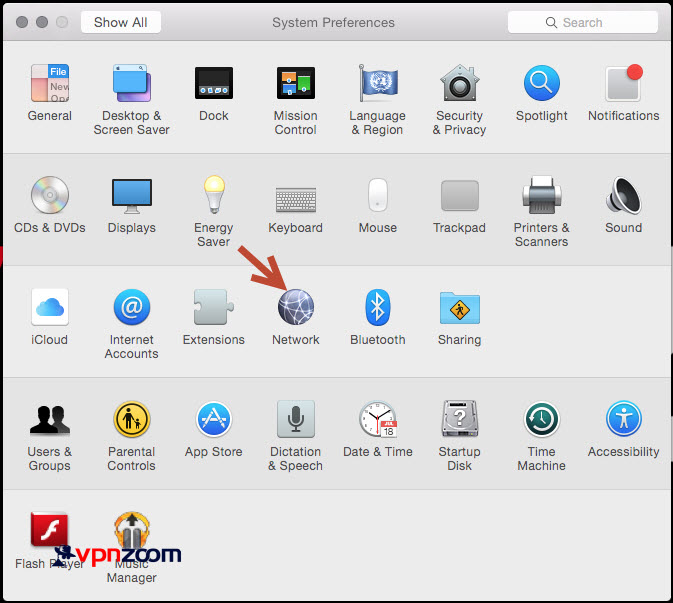
Step One: Open “System Preferences” by clicking on the Apple icon in the upper left corner of OS X. Click on “Network” from the “System Preferences” window.
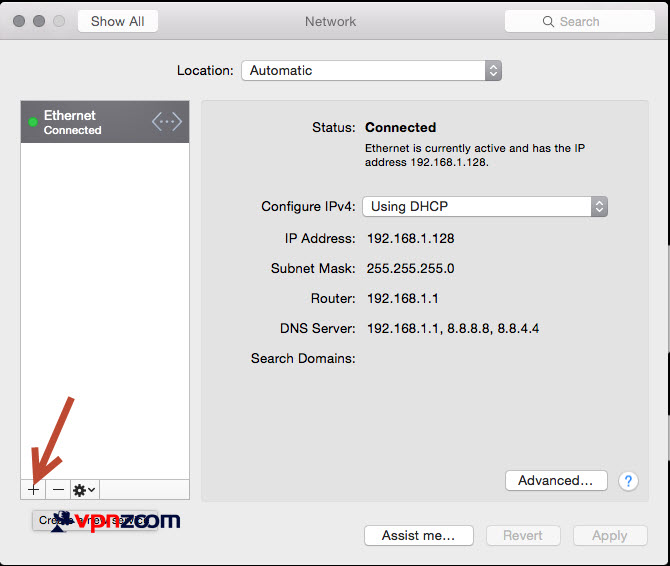
Step Two: Click on the + icon to create a new network connection.
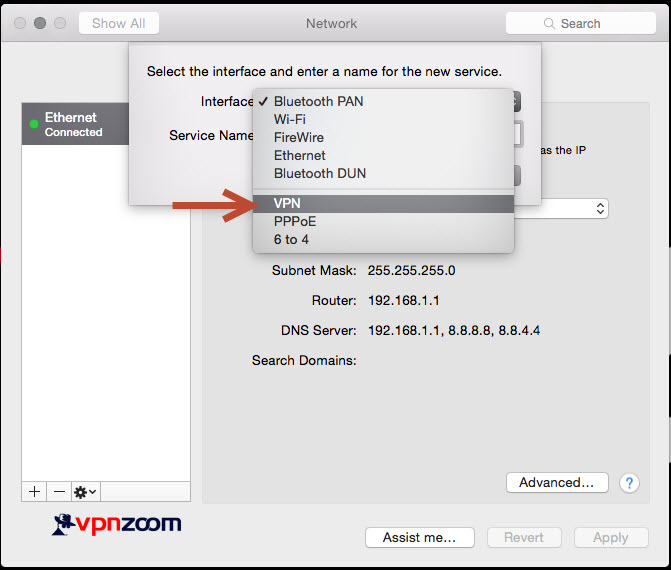
Step Three: Click the “Interface” drop down and choose VPN.
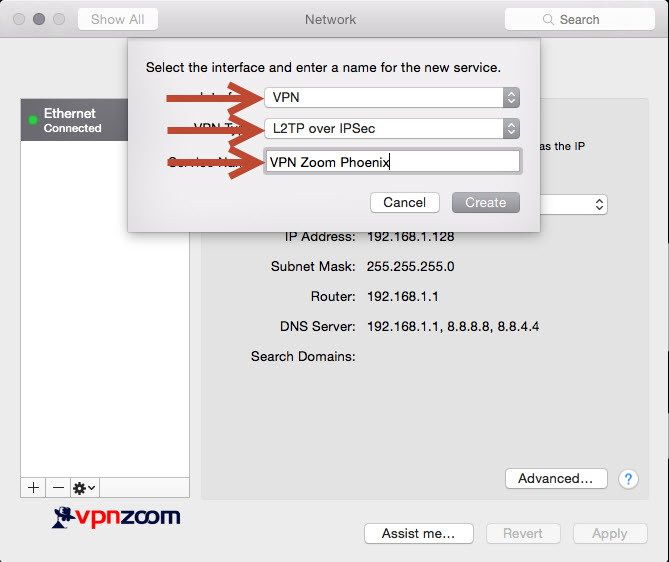
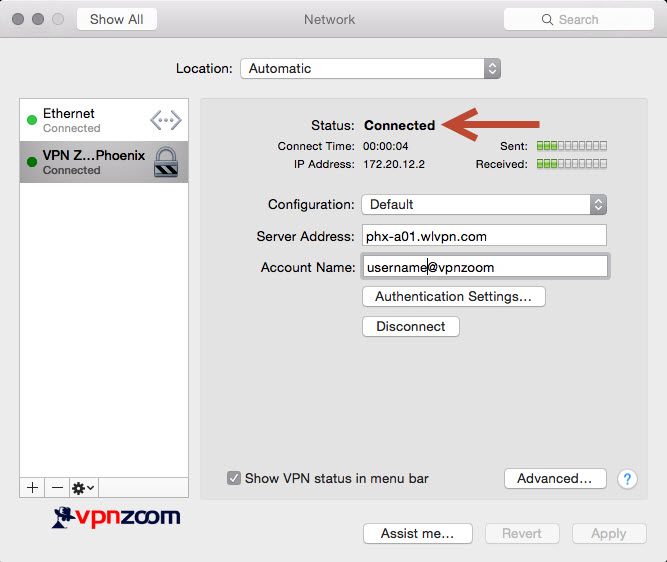
Step Four: For “VPN Type” select “L2TP over IPSec”. Enter a description of the VPN connection in the “Service Name” field to easily recognize the connection in OS X.
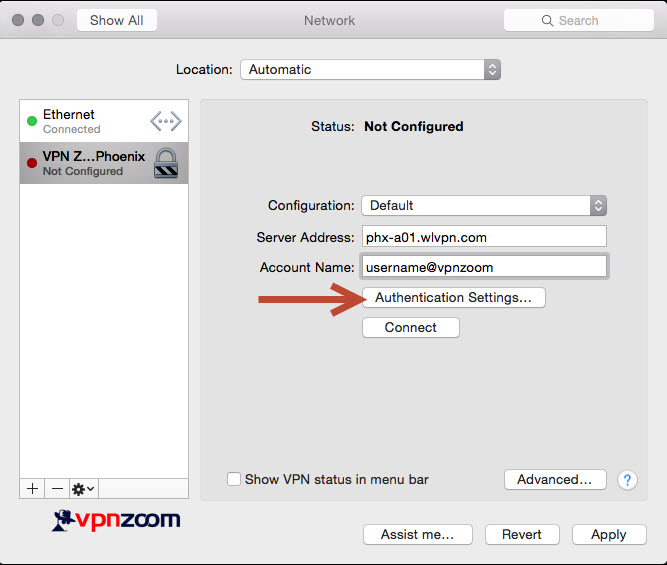
Step Five: Now enter a server address in the “Server Address” field. A complete list of our VPN servers can be viewed here. Enter your VPN Zoom username in the “Account Name” field. Note: All VPN Zoom usernames end with @vpnzoom (ex. username@vpnzoom). Then click on “Authentication Settings”.
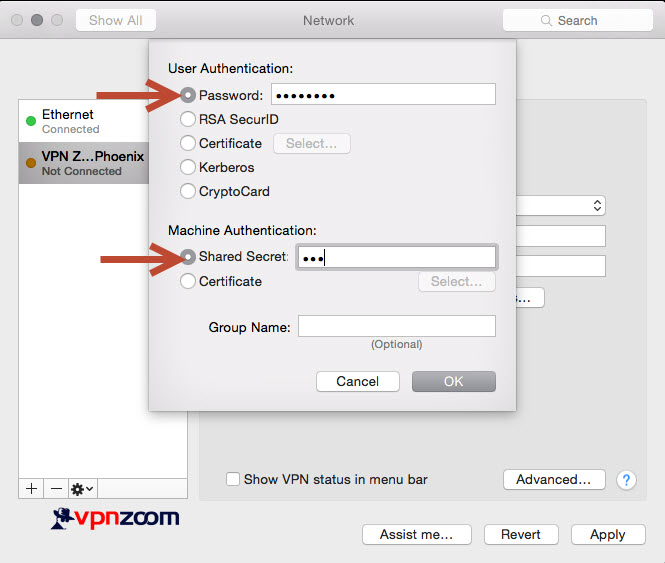
Step Six: Enter your VPN Zoom password in the “Password” field. In the “Shared Secret” below enter “vpn” without the quotes. Click OK.
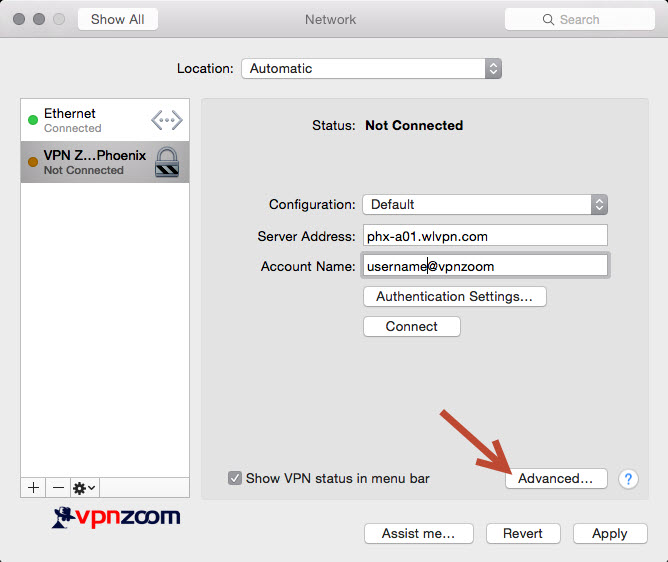
Step Seven: Now click on “Advanced”.
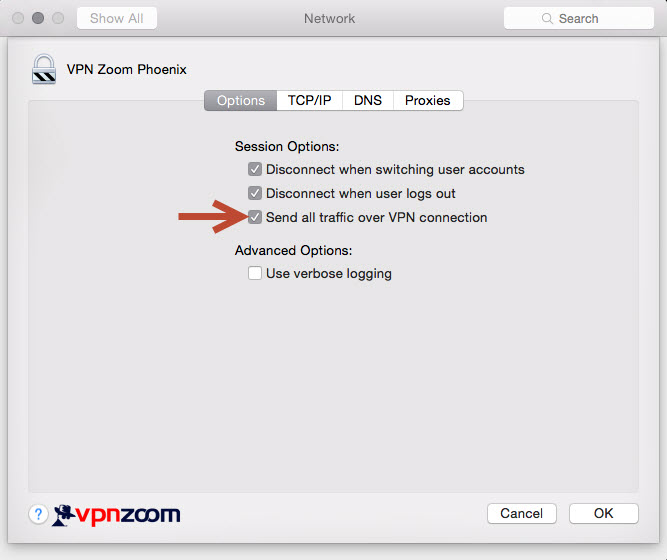
Step Eight: Tick the box next to “Send all traffic over VPN connection”. Click OK.
Step Nine: Now click on Connect. You are now connected to our VPN servers and can browse the Internet anonymously.

