Mac OS X EZConnect Software
We recommend using the EZConnect Connection Manager for accessing our VPN service with your iMac. If you’d like to manually configure OS X the following guide shows how to setup a PPTP VPN connection. If you have any questions about setup please contact our support team.
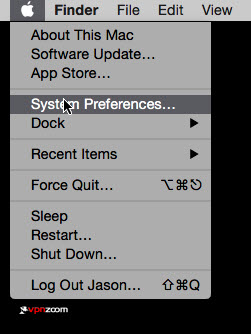
Step One: Minimize or suspend any running applications, and activate your main desktop, or ‘Finder’. Locate the Apple icon in the upper-left corner of the screen, and continue to the next step.
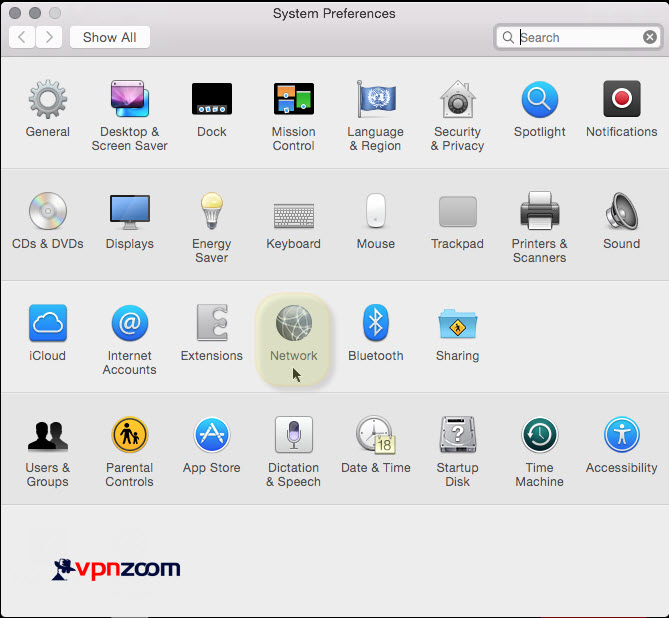
Step Two: Click the Apple icon, and in the resulting context menu, locate the ‘System Preferences…’ item. Click the ‘System Preferences…’ item and move on to the next step. Alternatively, you may click the ‘System Preferences…’ icon in your dock to continue.
Step Three: Within the ‘System Preferences’ menu, locate the ‘Internet & Wireless’ category. In this category, locate the ‘Network’ icon, and click it to move on.
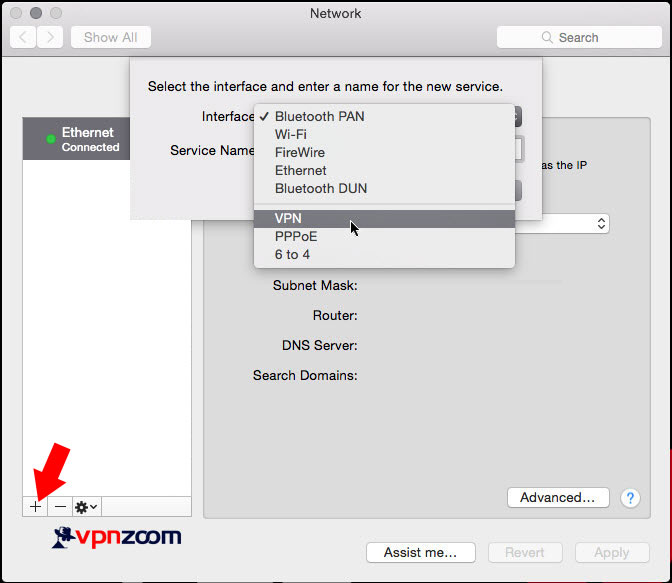
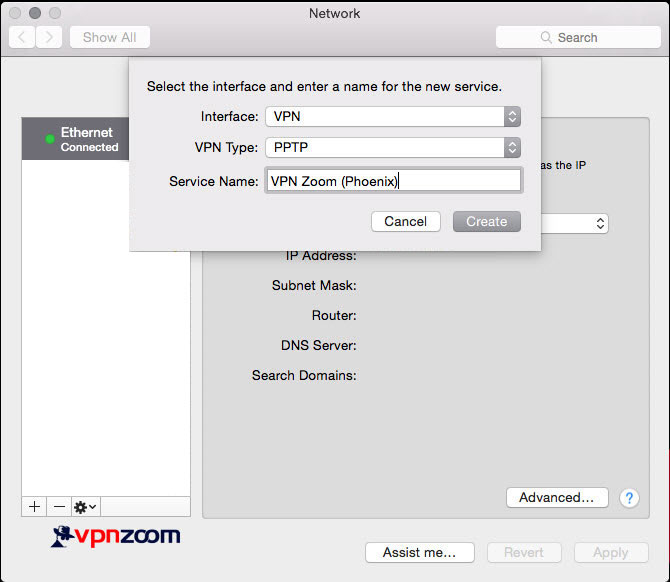
Step Four: To create a new connection profile by clicking the square ‘+’ (Plus) button as shown in the image. When the resulting dialog appears, look for the ‘Interface’ drop-down box, and click. In the drop-down context menu, locate, and select the item labeled ‘VPN’ to continue.
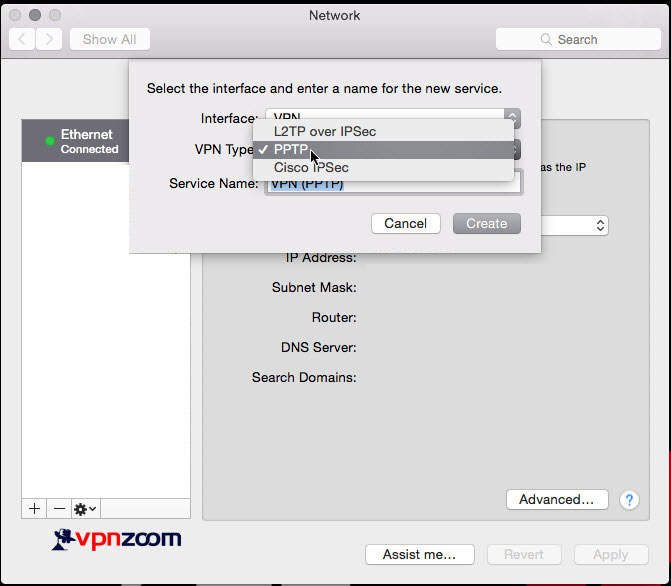
Step Five: Once you’ve assigned the interface type, click the second drop-down box that appears below, labeled ‘VPN Type’. As this tutorial covers the PPTP protocol, select the ‘PPTP’ item from the drop-down menu, and move on to the next step.
Step Six: Finally, enter a descriptive name in the ‘Service Name’ field below – this field can contain whatever descriptive title that meets your needs. Click the ‘Create’ button to continue.
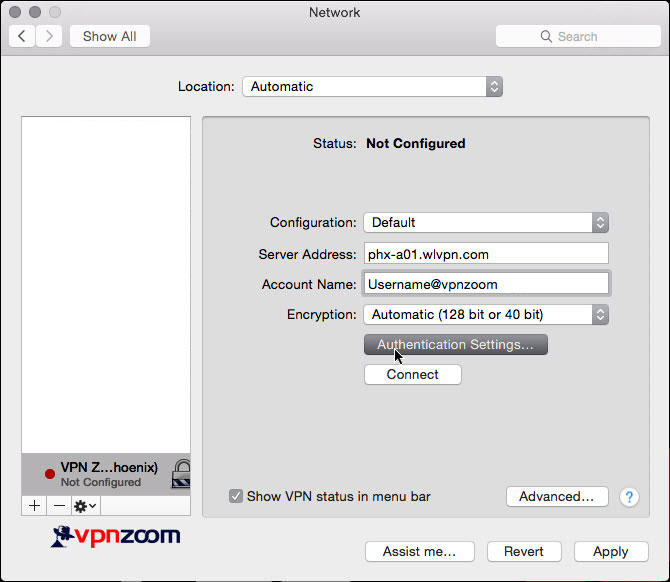
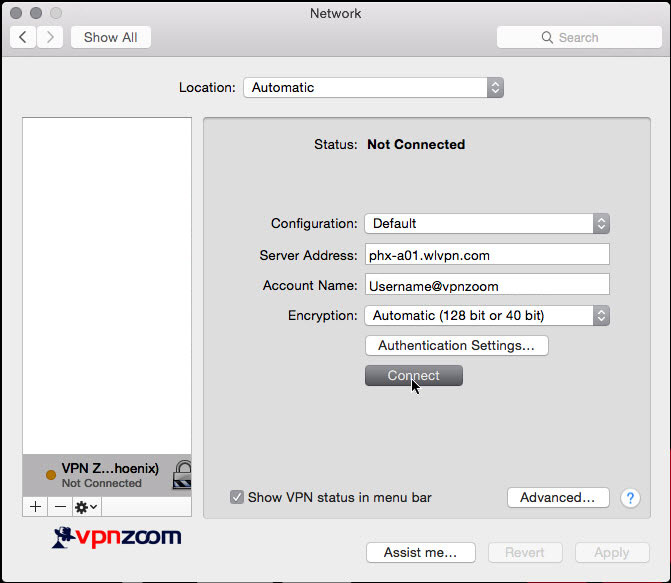
Step Seven: Once the new connection profile is made, fill in your selected VPN Zoom server address in the ‘Server Address’ field – when choosing a server to connect to, geographical location may be a concern. Please reference our server list for more details. A complete list of our VPN servers can be viewed here. Fill your username in the ‘Account Name’ field – remember that all usernames end with @vpnzoom. Confirm that the ‘Encryption:’ drop-down box is set to the default ‘Automatic (128 bit or 40 bit)’ setting. Finally, locate the ‘Authentication Settings…’ button, and click to move on.
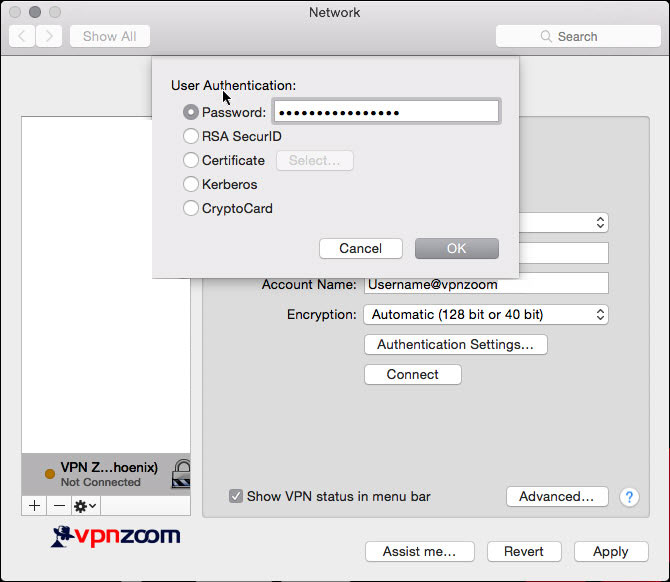
Step Eight: In the resulting dialog, enter your VPN Zoom password in the ‘Password’ field. As before, this field is case-sensitive, so double-check against the confirmation email we sent you at sign-up. Click the ‘OK’ button to continue.
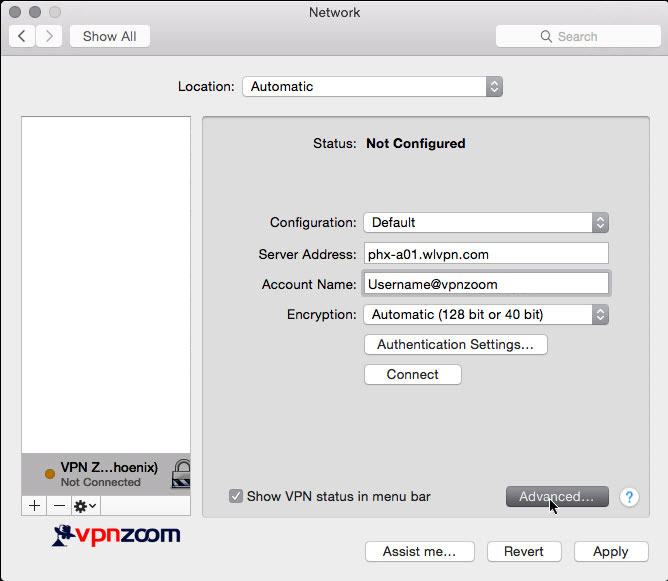
Step Nine: When you return to the previous menu, locate the ‘Advanced…’ button in the lower-right corner, next to the question mark icon. Click the ‘Advanced…’ button to continue.
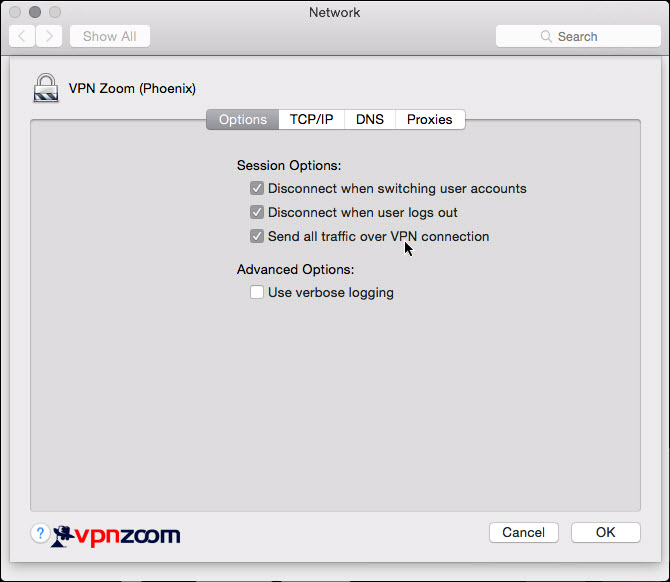
Step Ten: In the ‘Advanced’ settings pane, locate the ‘Session Options’ category. Tick the third checkbox down, labeled ‘Send all traffic over VPN connection’, then click the ‘OK’ button in the lower-right corner to continue.
Step Eleven: Test your newly created connection by clicking the ‘Connect’ button, just below the ‘Authentication Settings…’ button, and move on to the next step.
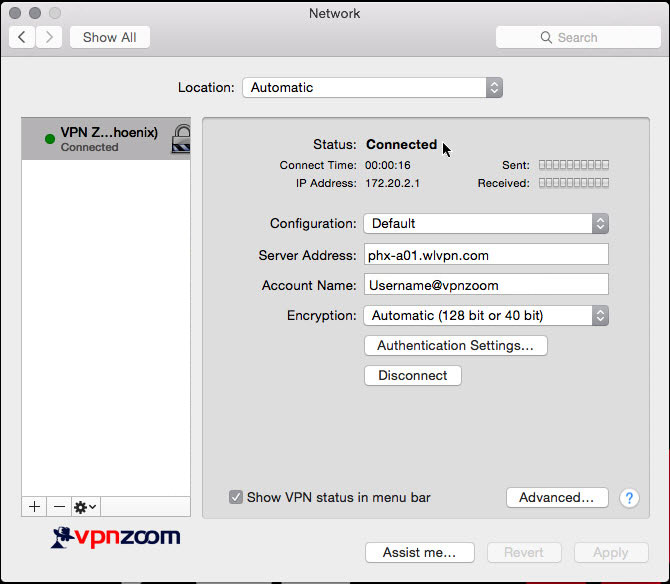
Step Twelve: You are now connected and secured. For a quick way to access your VPN session, locate the the indicator on the top of the screen – look for the session ‘Connect Time:’ indicator, and click to open a context menu. From this menu, you quickly start and stop your VPN session without navigating though the ‘System Preferences’ menu.

