The following guide shows how to setup a PPTP VPN connection with Ubuntu Linux. If you have any questions about setup please contact our support team.
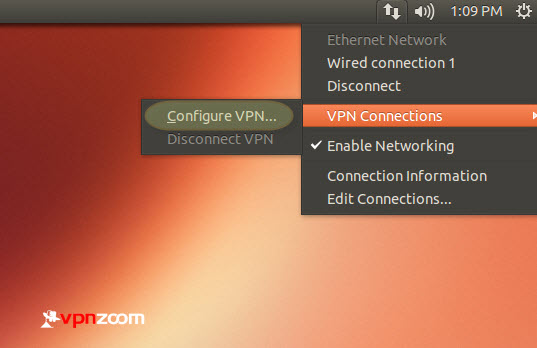
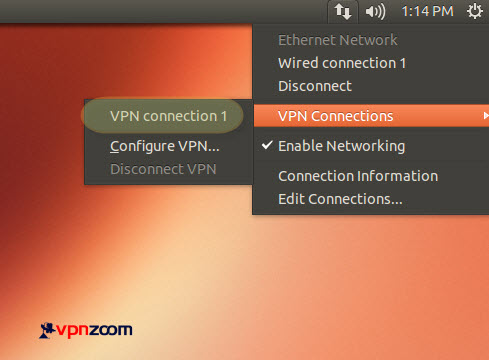
Step One: Point your cursor to the ‘Network Manager Indicator’ icon, located in the ‘Notification Area’ on the default desktop panel, in the upper-right corner. Click this icon, and mouse over the ‘VPN Connections’ item – click the ‘Configure VPN…’ item in the expanded menu to continue.
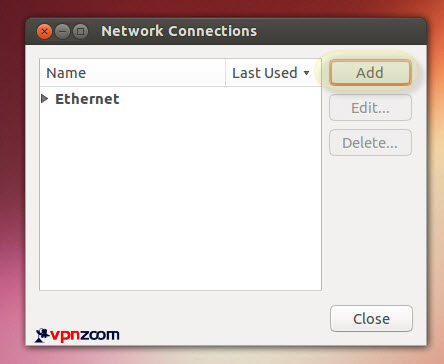
Step Two: When the “Network Connections” manager screen appears click on “Add”.
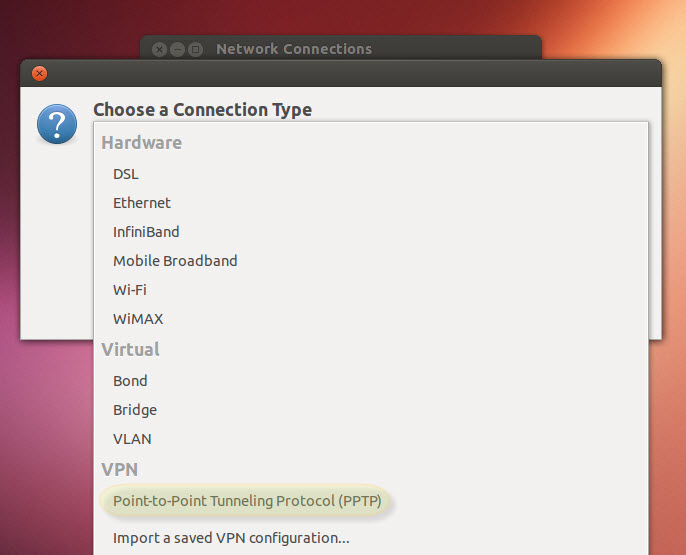
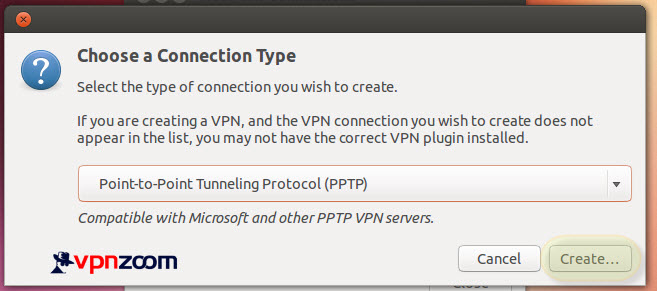
Step Three: Click the “Choose A Connection Type” drop down and select VPN – Point-to-Point Tunneling Protocol (PPTP).
Step Four: Click on “Create”.
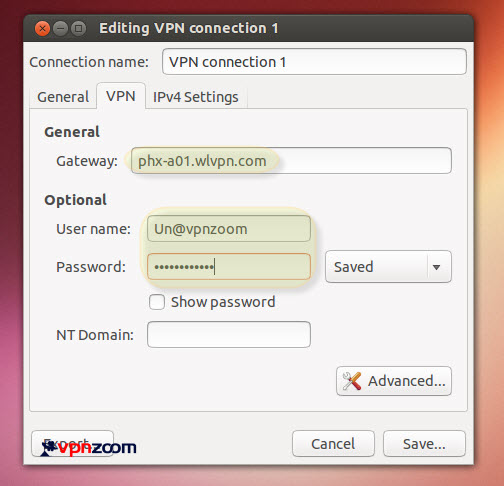
Step Five: In the gateway field enter a VPN Zoom server address. A complete list of our VPN servers can be viewed here. Then enter your username (Note: all user names end with @vpnzoom. ex: username@vpnzoom) and password and click “Advanced”.
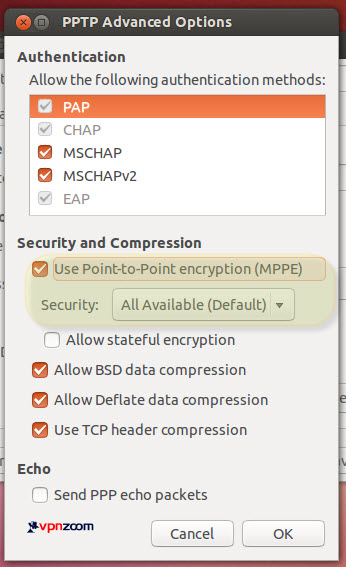
Step Six: Under the ‘Security and Compression’ label, tick the checkbox labeled ‘Use Point-to-Point encryption (MPEE)’. Next, scroll through the frame labeled ‘Authentication’, and confirm that ONLY the MSCHAP and MSCHAPv2 boxes are ticked. Reference the screenshot for the correct settings. Finally, click the ‘OK’ button in the bottom-right corner of the panel to continue.
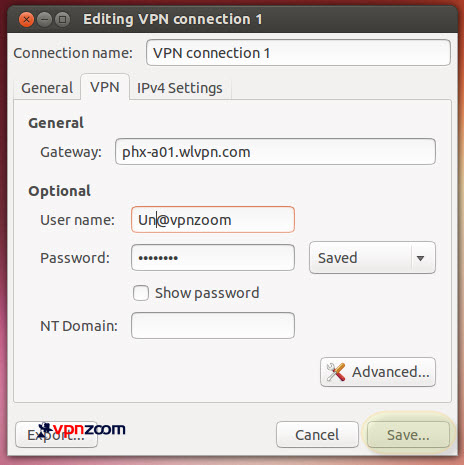
Step Seven: Click “Save” to save your VPN connection settings.
Step Eight: Click on the ‘Network Manager Indicator’ icon, located in the ‘Notification Area’, and then navigate to the ‘VPN Connections’ as preformed in the first step. Now, in the expanded menu, you should see an additional item, labeled as the ‘Connection name:’ defined in step three. You may click this item to initialize the connection. If you declined to save your full credentials, you will soon see a dialog prompting you to enter your username and password.
Step Nine: You are now connected to our secure VPN servers.

