Windows 7 EZConnect Software
We recommend using the EZConnect Connection Manager for accessing our VPN service. If you’d like to manually configure Windows 7 the following guide shows how to setup a L2TP VPN connection. If you have any questions about setup please contact our support team.
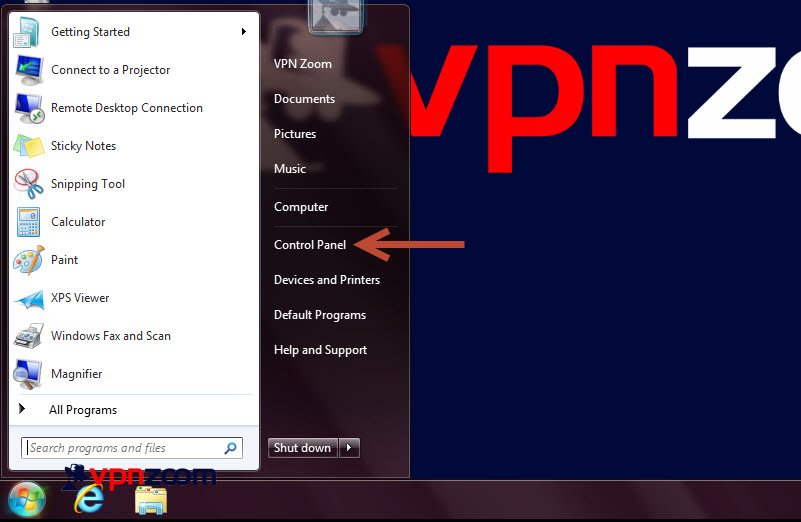
Step One: Click the Start Button and then click on “Control Panel”.
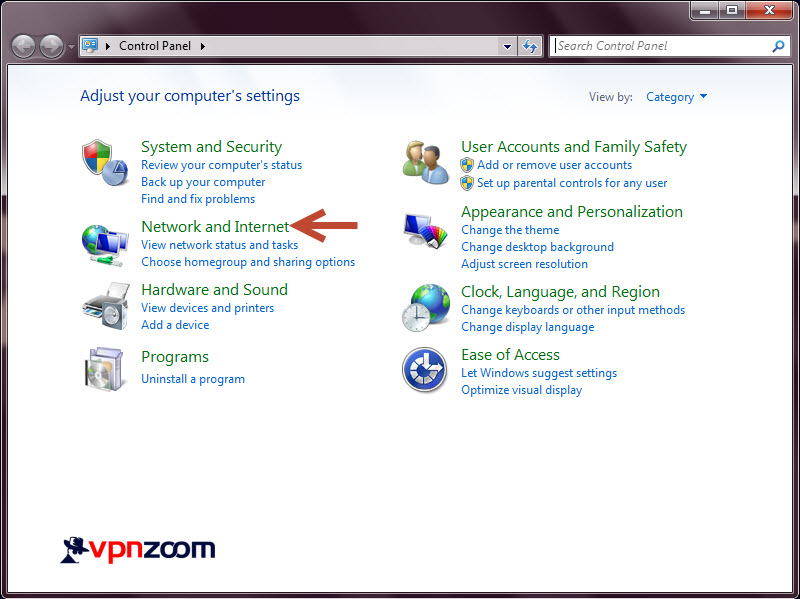
Step Two: Click on “Network and Internet”.
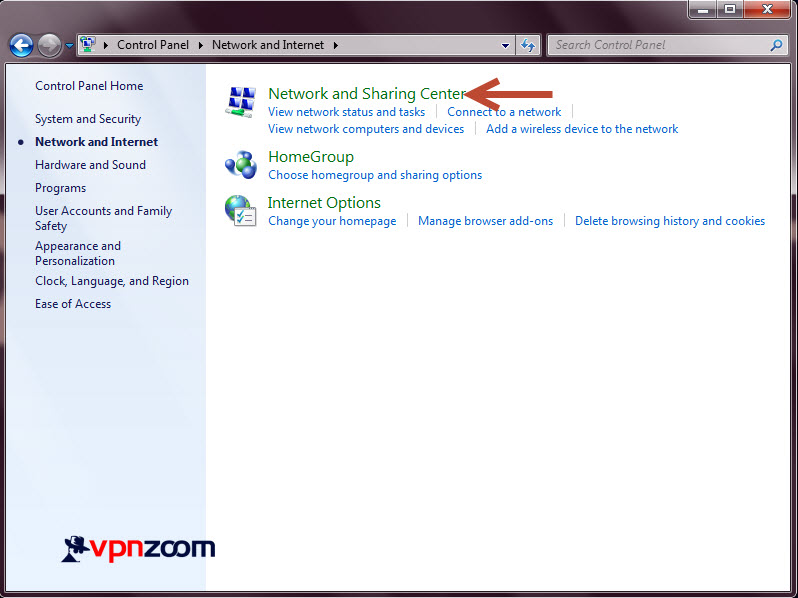
Step Three: Click on “Network and Sharing Center”.
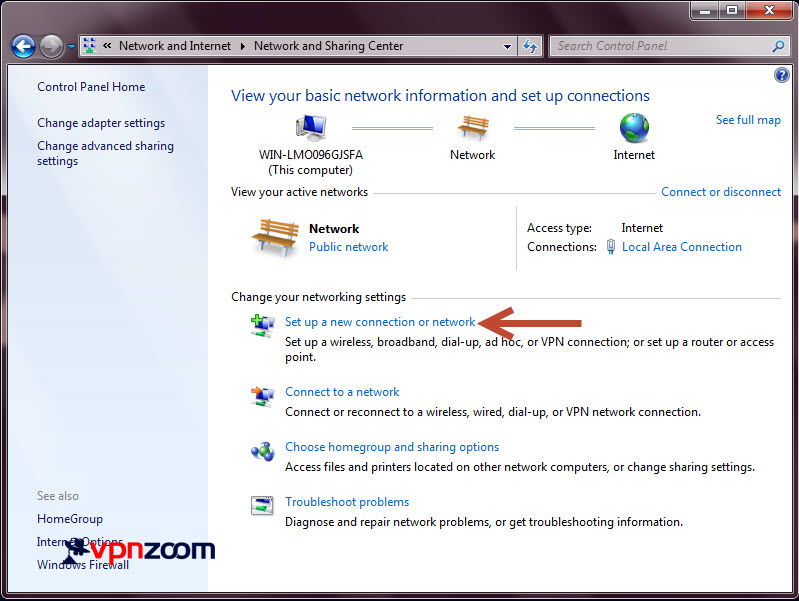
Step Four: Click “Set up a new connection or network”.
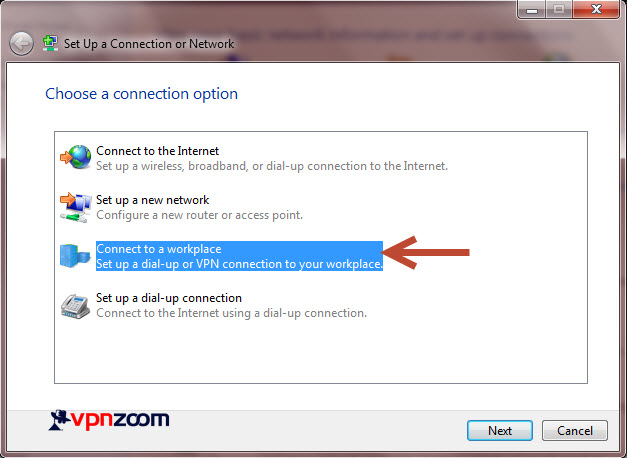
Step Five: Select “Connect to a workplace” and click next.
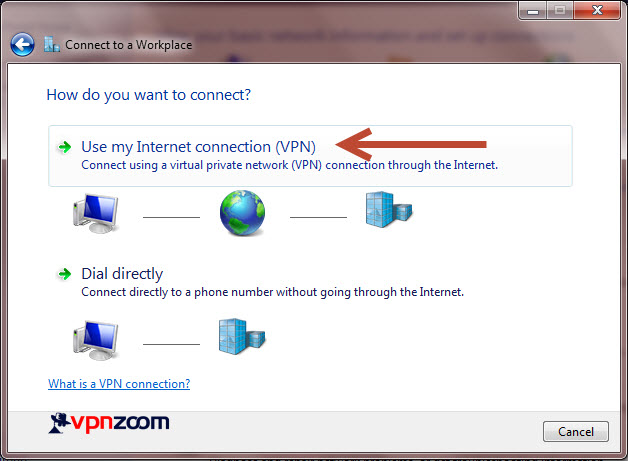
Step Six: Select “Use my Internet connection (VPN)”.
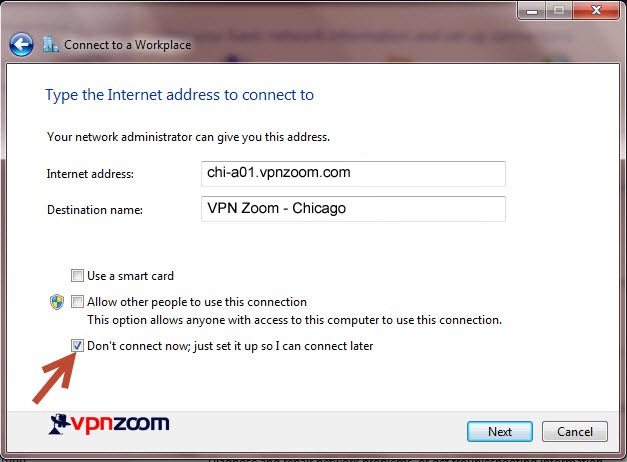
Step Seven: Enter a VPN Zoom server address in the Internet address field. A complete list of our VPN servers can be viewed here. Then enter a destination name that describes the new VPN connection. Tick the “Don’t connect now; just set it up so I can connect later” box.
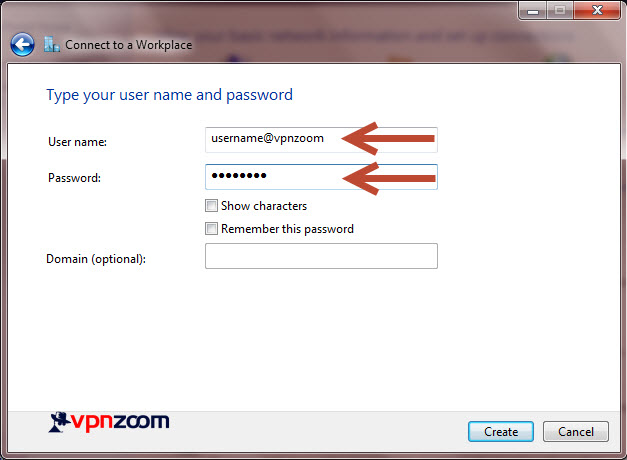
Step Eight: Enter your username and password. Remember that all VPN Zoom usernames end with @vpnzoom (ex. username@vpnzoom).
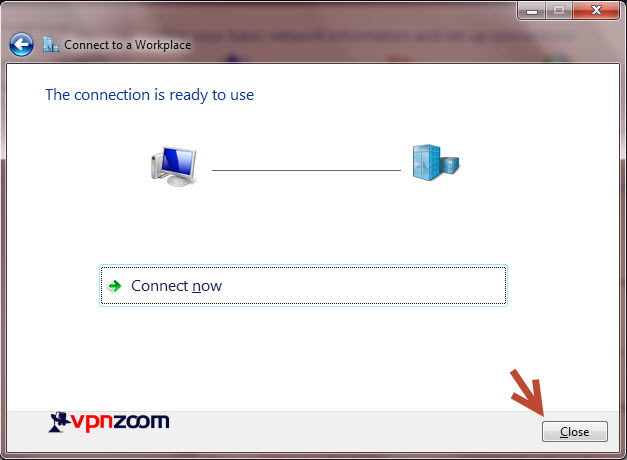
Step Nine: Click on close.
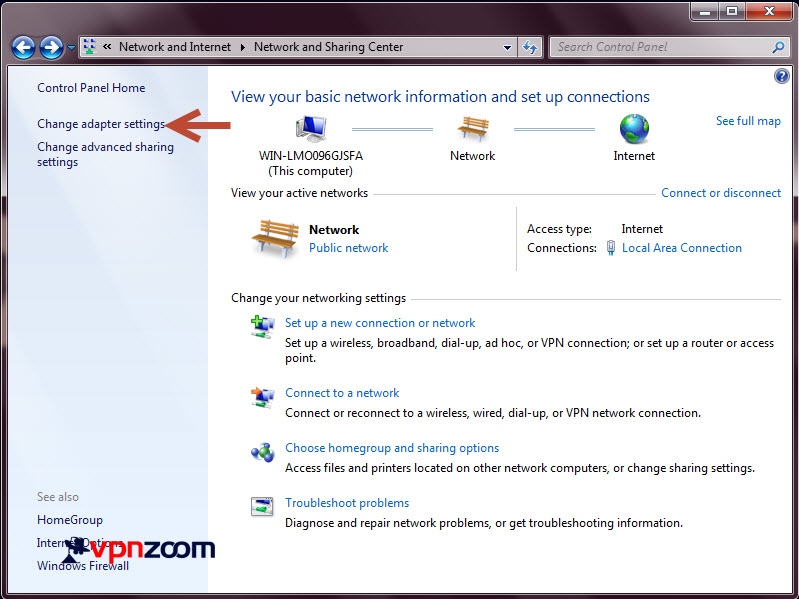
Step Ten: Now click on “Change adapter settings” in the left menu.
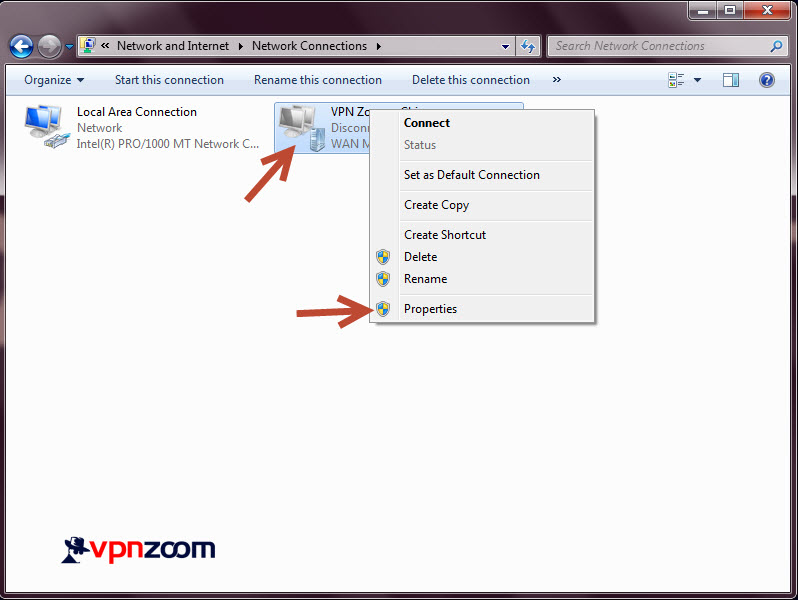
Step Eleven: Locate the newly created VPN connection and right click on it. Select “Properties”.
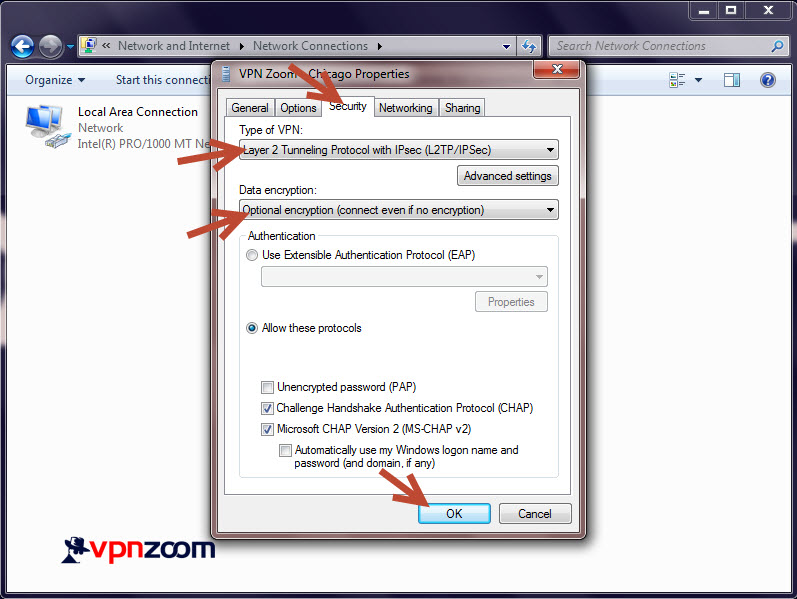
Step Twelve: Click on the “Security” tab. In the “Type of VPN” drop down select “Layer 2 Tunneling Protocol with IPsec (L2TP/IPSec). Change “Data Encryption” to Optional. Now click “OK” to continue.
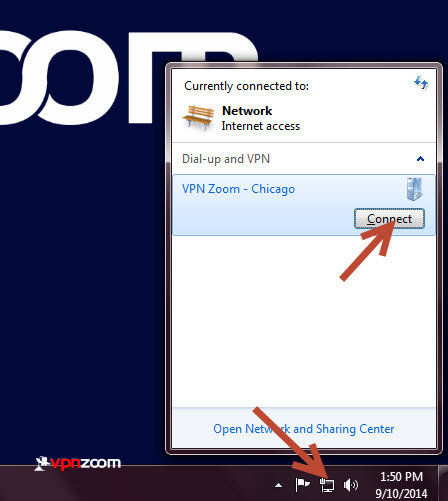
Step Thirteen: Locate the Network icon in the system tray by the clock. Click it to show the newly created connection. Click on “Connect”.
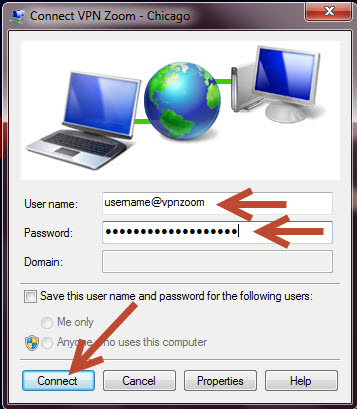
Step Fourteen: Enter your username and password and click “Connect”. Note that all usernames end with @vpnzoom (ex. username@vpnzoom).
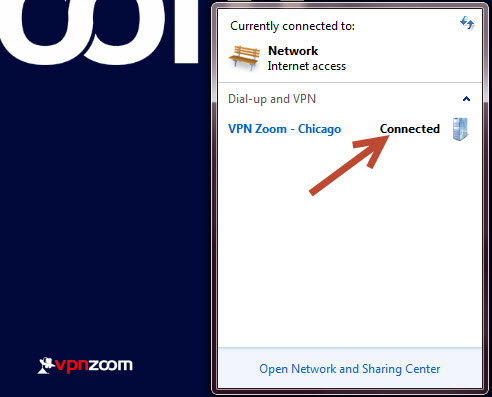
Step Fifteen: You are now connected and secured. Browse the Internet freely and unrestricted.

