Windows 7 EZConnect Software
We recommend using the VPN Zoom Connection Manager for accessing our VPN service. If you’d like to manually configure Windows 7 the following guide shows how to setup a OpenVPN connection. If you have any questions about setup please contact our support team.
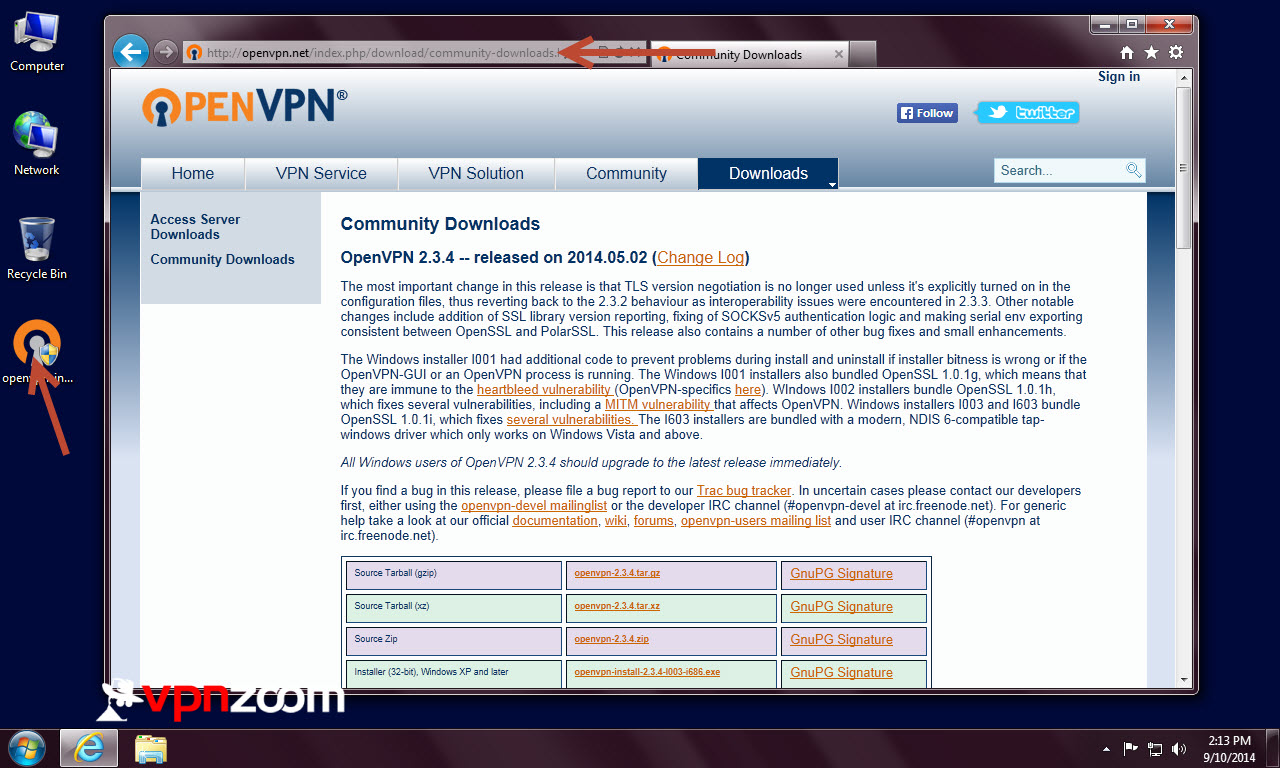
Step One: Visit OpenVPN.net to download the latest version of the OpenVPN connection client for your version of Windows 7.
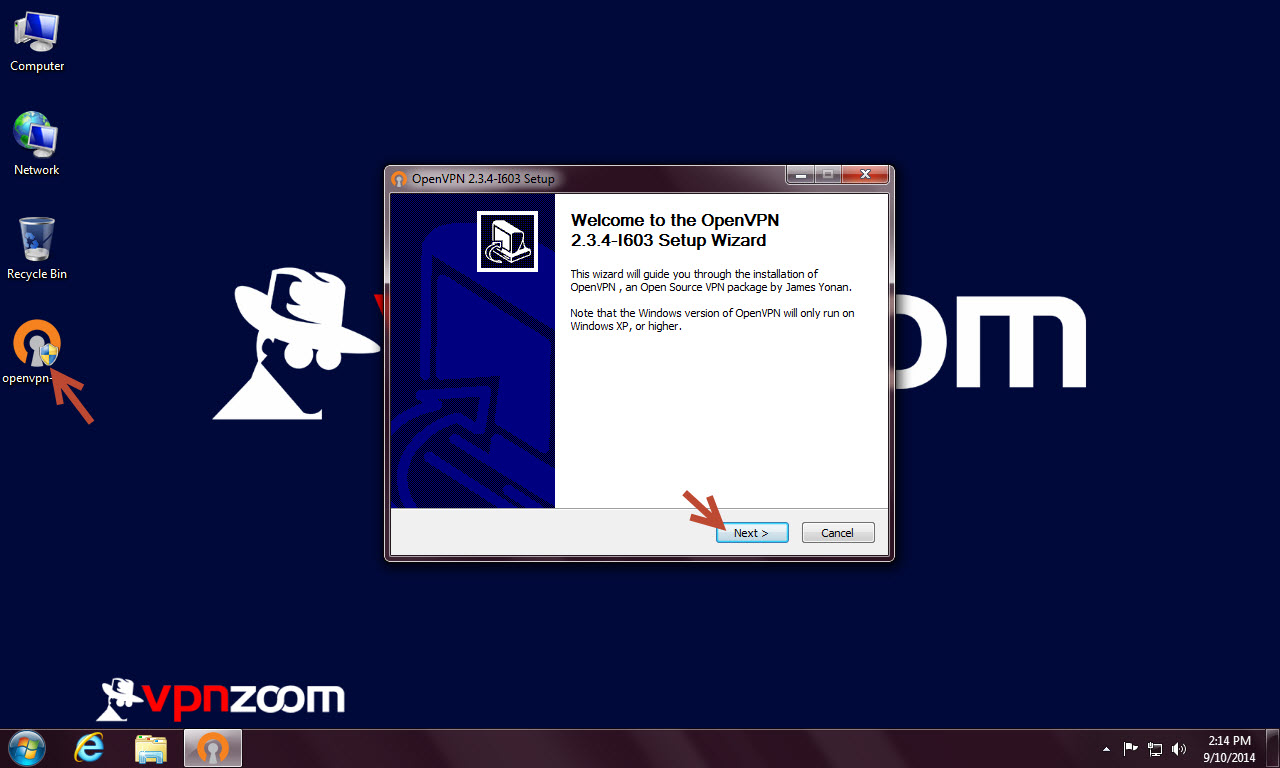
Step Two: Once downloaded start the installer.
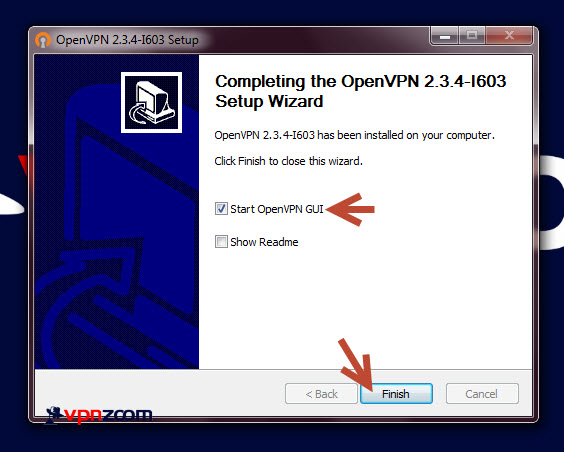
Step Three: At the end of the installer tick “Start OpenVPN GUI” and untick “Show Readme”. Click on Finish.

Step Four: You will now see the OpenVPN GUI icon in the system tray by the clock.
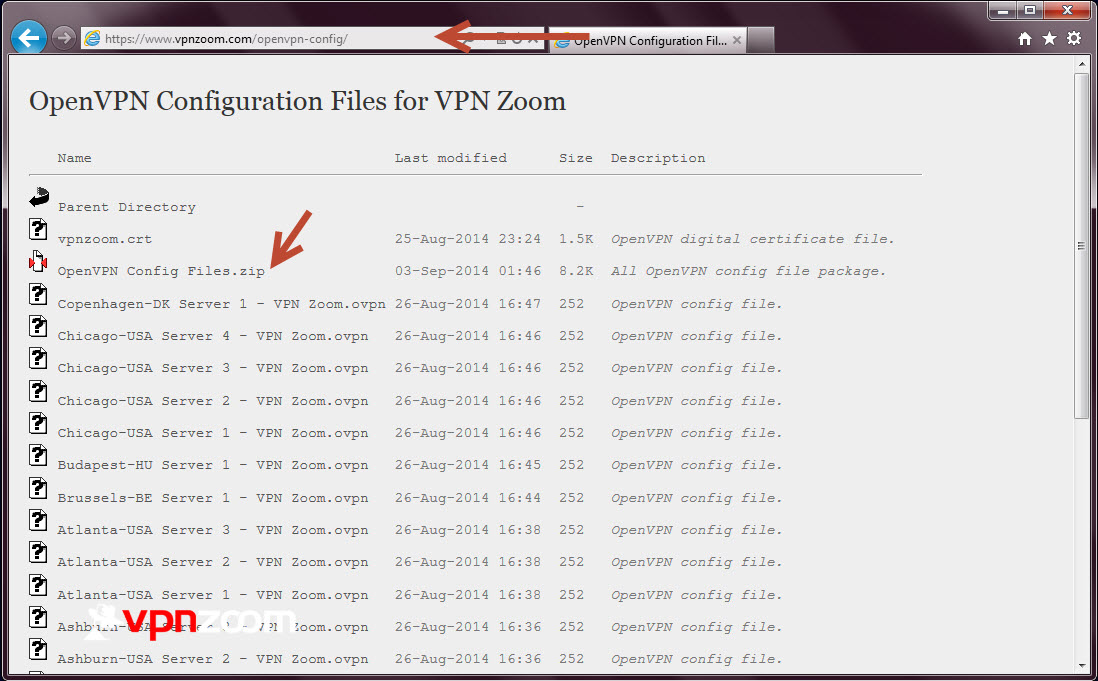
Step Five: Now visit the VPN Zoom OpenVPN configuration page to download the VPN Zoom OpenVPN configuration file. You can download the whole zip package which contains all the config files or download individual .OVPN config files. You will also need the vpnzoom.crt certificate file.
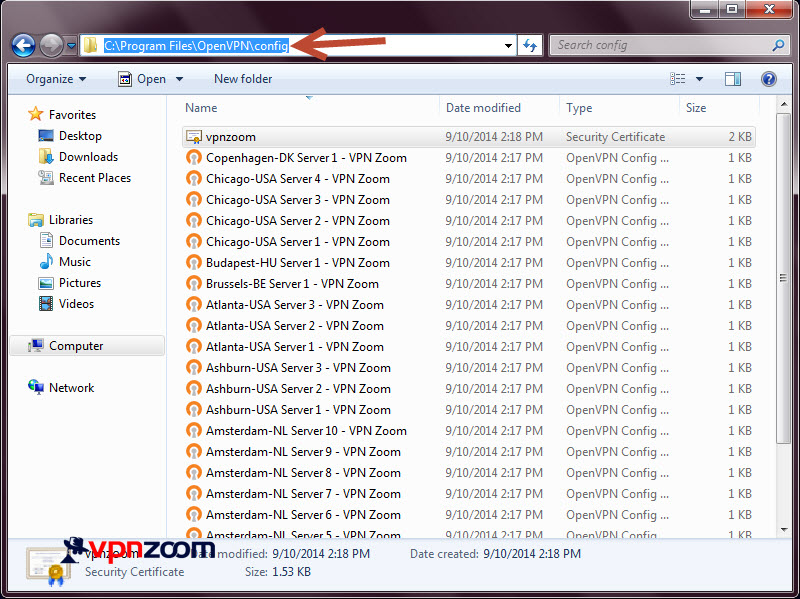
Step Six: Place the downloaded config files in C:\Program Files\OpenVPN\config directory.
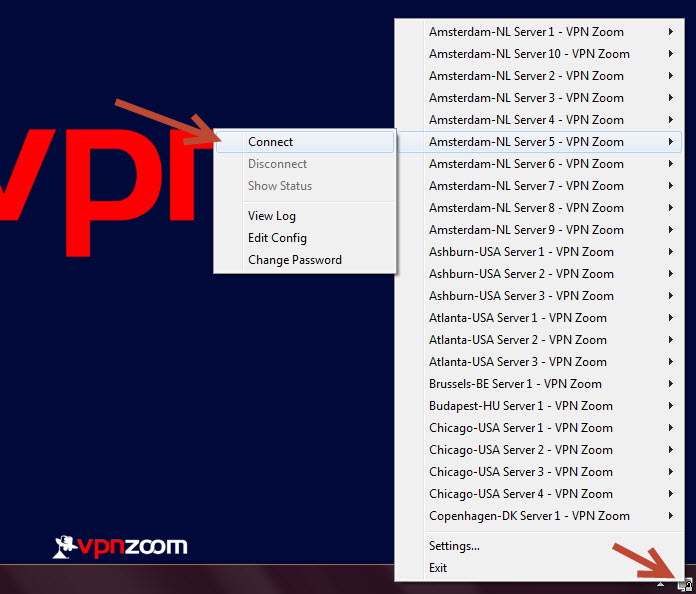
Step Seven: Now right click on the OpenVPN GUI client in the system tray to display a list of servers. Locate the server you would like to connect to a click “Connect”
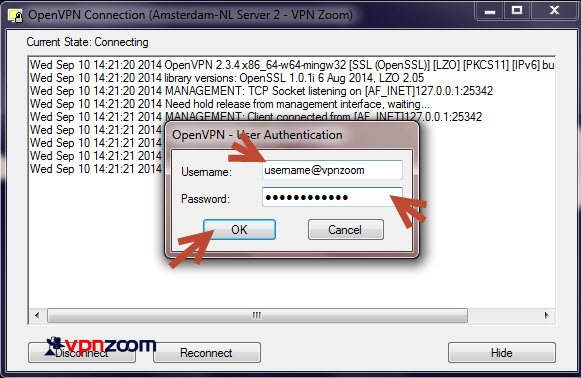
Step Eight: Enter your username and password in the “User Authentication” window. Remember that all VPN Zoom usernames end with @vpnzoom (ex. username@vpnzoom). Click OK.
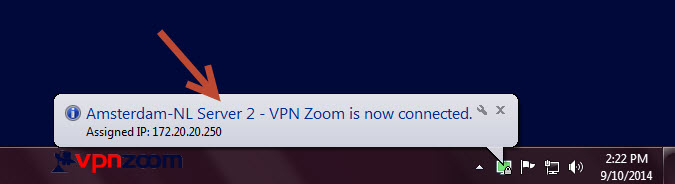
Step Eight: You are now connected to VPN Zoom using OpenVPN. Your connection is now secure. Browse the Internet freely and secure.