Windows 7 EZConnect Software
We recommend using the EZConnect Connection Manager for accessing our VPN service. If you’d like to manually configure Windows 7 the following guide shows how to setup a PPTP VPN connection. If you have any questions about setup please contact our support team.
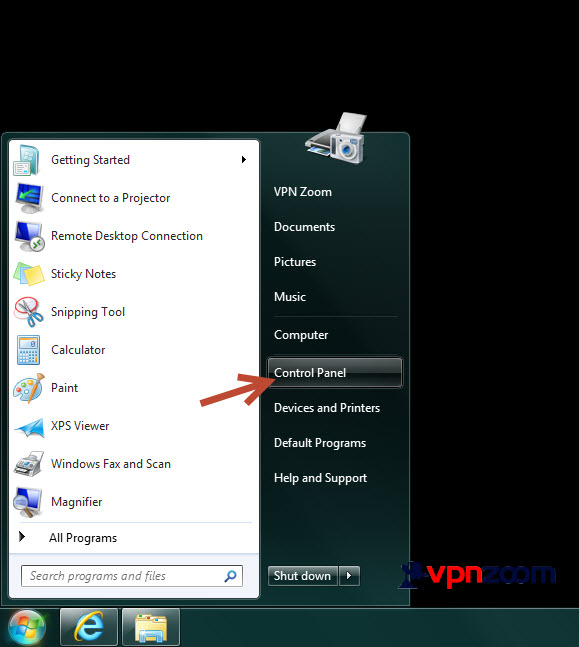
Step One: Click “Start” or press the “Windows” button in the lower left corner of the screen. Navigate to “Control Panel” and click to open.
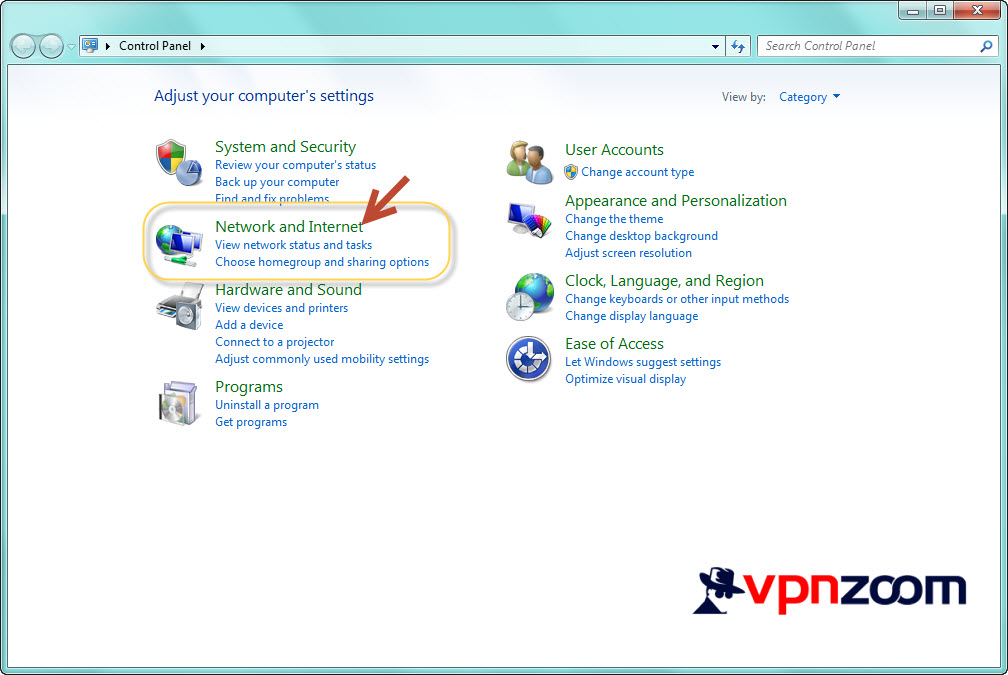
Step Two: Find the “Network and Internet” category and click it.
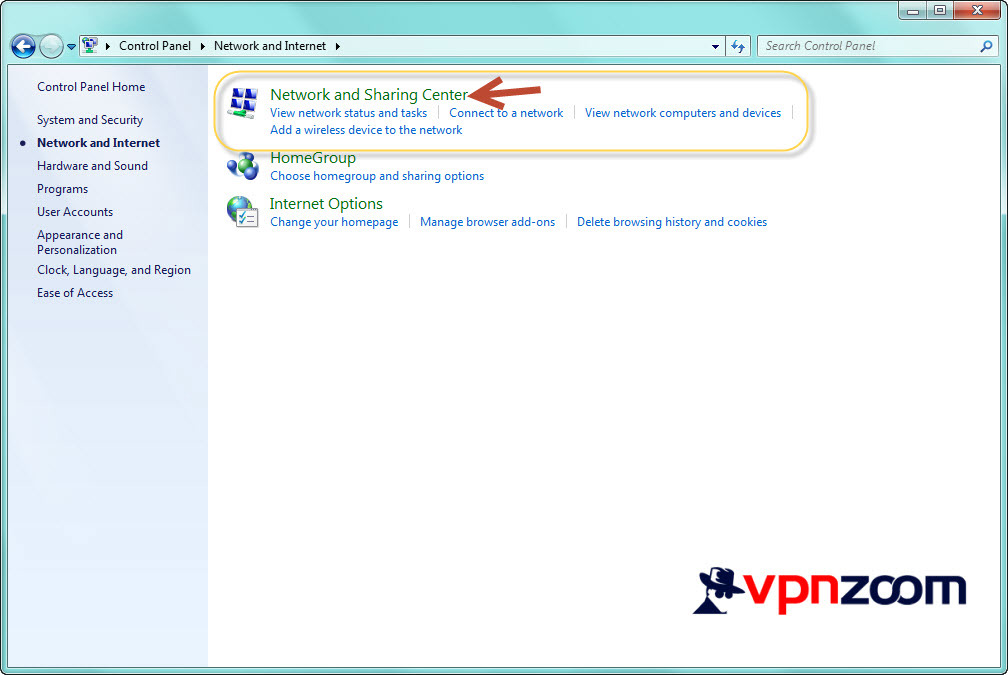
Step Three: Click on “Network and Sharing Center”
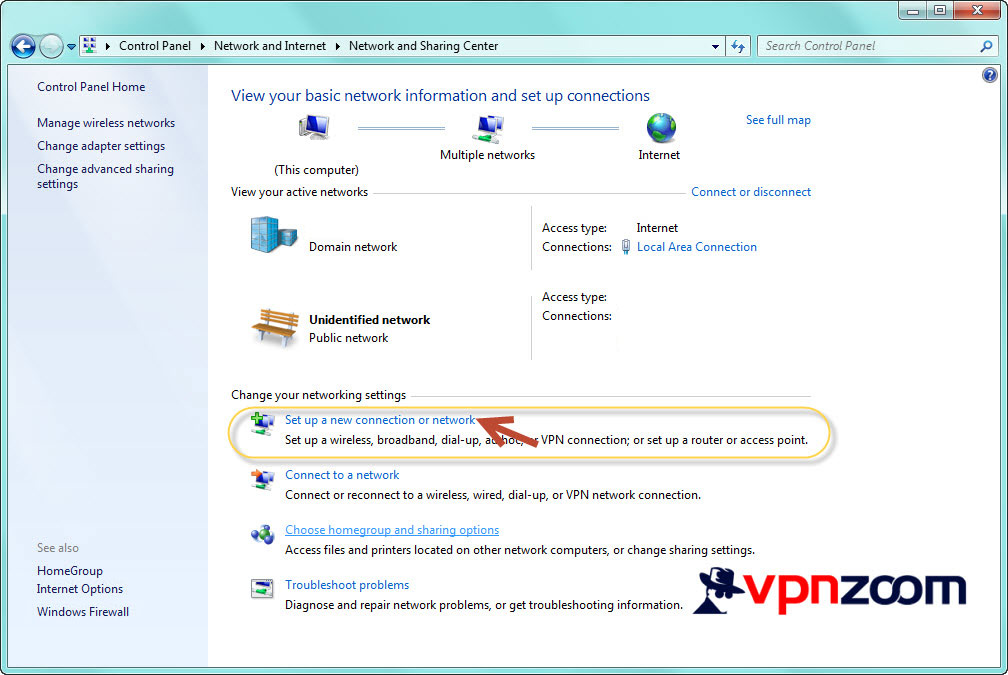
Step Four: Under the heading labeled “Change your networking settings”, click on the text labeled “Set up a new connection or network”
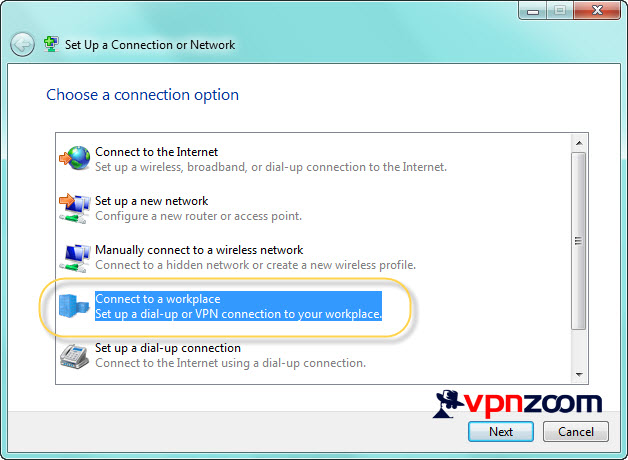
Step Five: Click on “Connect to a workplace” to select it and then click “Next”
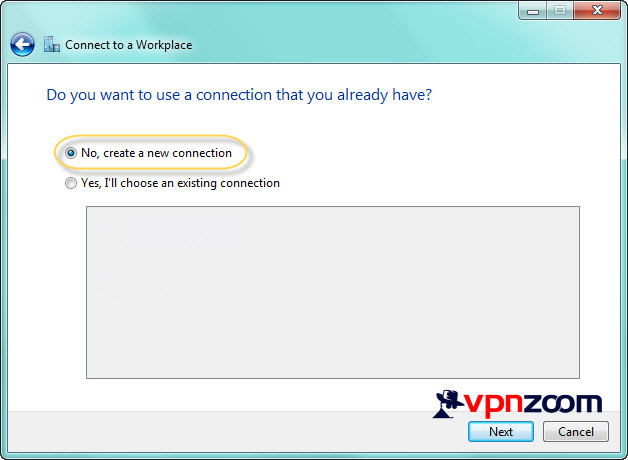
Step Six: This menu may appear. If it does select “No, create a new connection”. If this menu doesn’t appear continue to the next step.
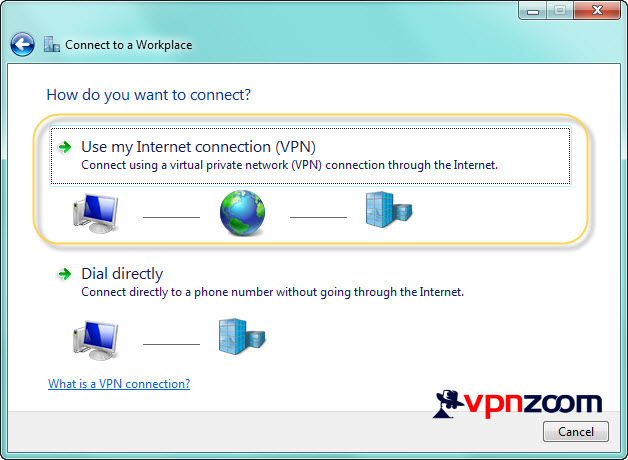
Step Seven: Now click on “Use my Internet connection (VPN)”
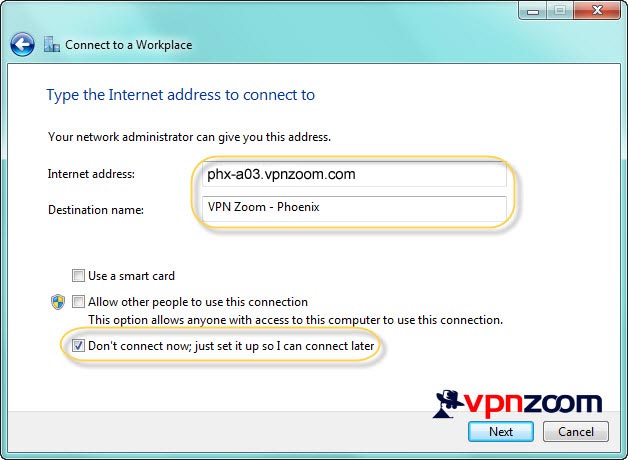
Step Eight: In the “Internet Address” field enter a VPN Zoom server address. A complete list of our VPN servers can be viewed here. For the destination name enter a title you’d like the VPN connection labeled as throughout the operating system. Check the box that says “Don’t connect now, just set it up so I can connect later” and click “Next”.
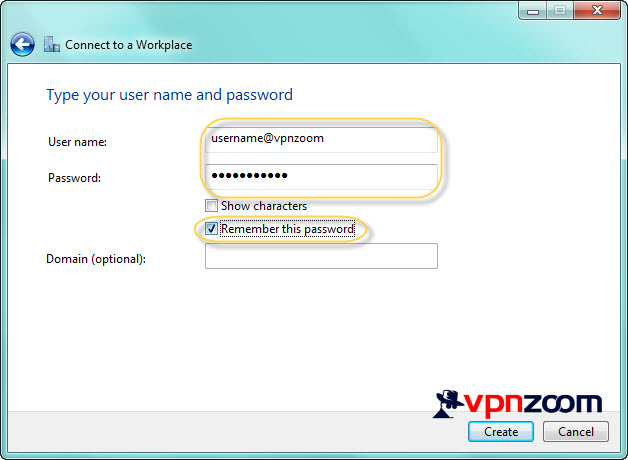
Step Nine: Enter your username and password. Do not enter any information in the domain field. Note: Usernames always end with @vpnzoom (ex. username@vpnzoom).
Step Ten: Close this Window as additional configuration is needed.
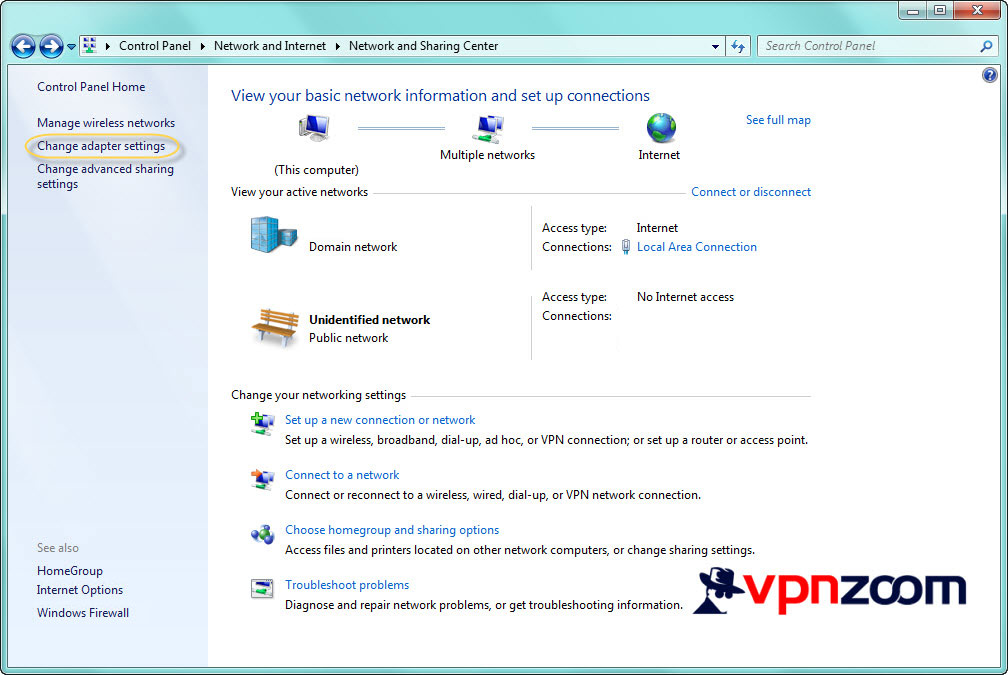
Step Eleven: Now back in the “Network and Sharing Center” locate “Change adapter settings” in the left menu.
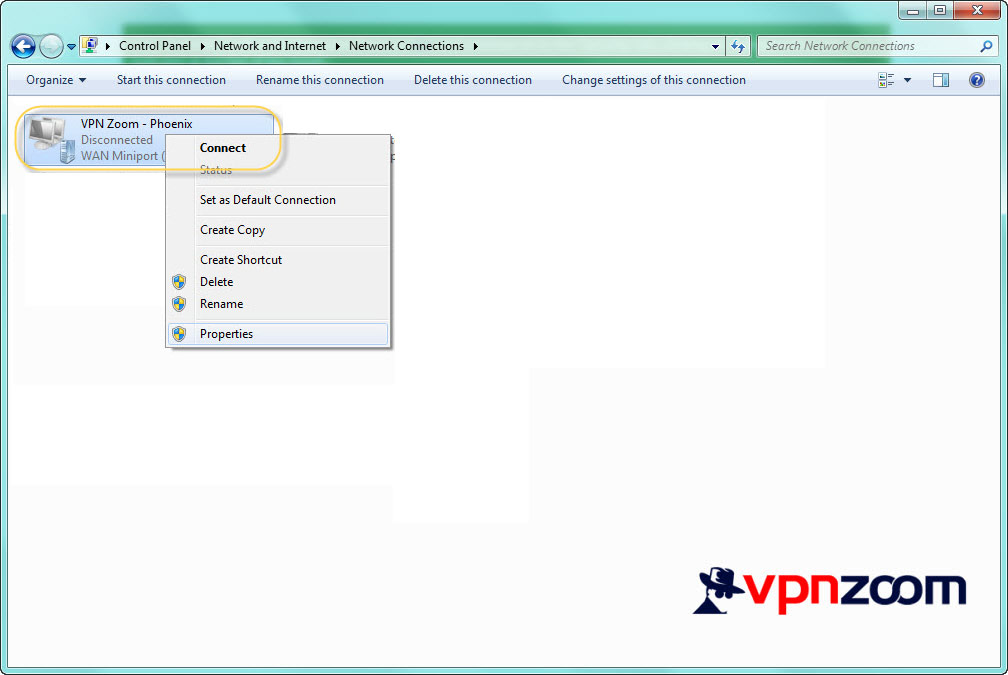
Step Twelve: Locate the newly created VPN Zoom network connection. Right click it and choose “Properties”.
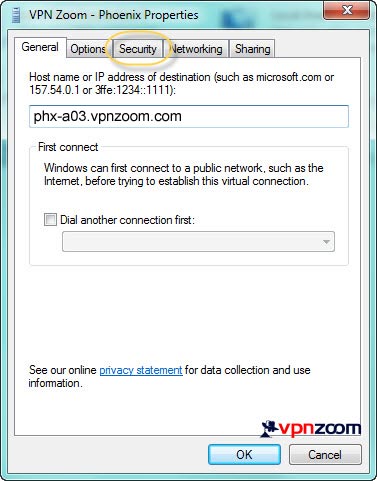
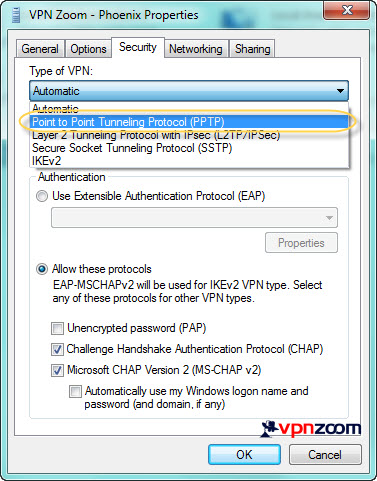
Step Thirteen: Select the “Security” tab from the properties window.
Step Fourteen: Click the “Type of VPN” drop down and choose “Point to Point Tunneling Protocol (PPTP).
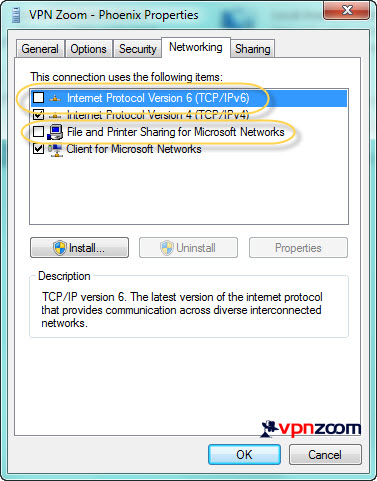
Step Fifteen: Now click on the “Networking” tab and un-check “Internet Protocol Version 6” and “File and Printer Sharing for Microsoft Networks”. Click on OK to save the changes.
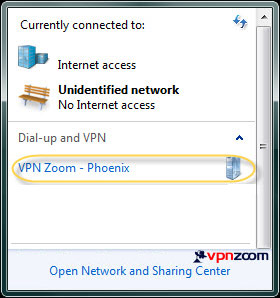
Step Sixteen: Now locate the network connection icon in the bottom right corner by the clock and click it. A menu will appear with a list of VPN connections. Select the newly created VPN Zoom connection and click connect.
Step Seventeen: Your username and password should already contain the correct login credentials. If not enter your username and password in the fields. Note: All usernames end with @vpnzoom (ex. username@vpnzoom). Click connect. You are now connected and secure.

