Windows 8 EZConnect Software
We recommend using the EZConnect Connection Manager for accessing our VPN service. If you’d like to manually configure Windows 8 the following guide shows how to setup a L2TP VPN connection. If you have any questions about setup please contact our support team.
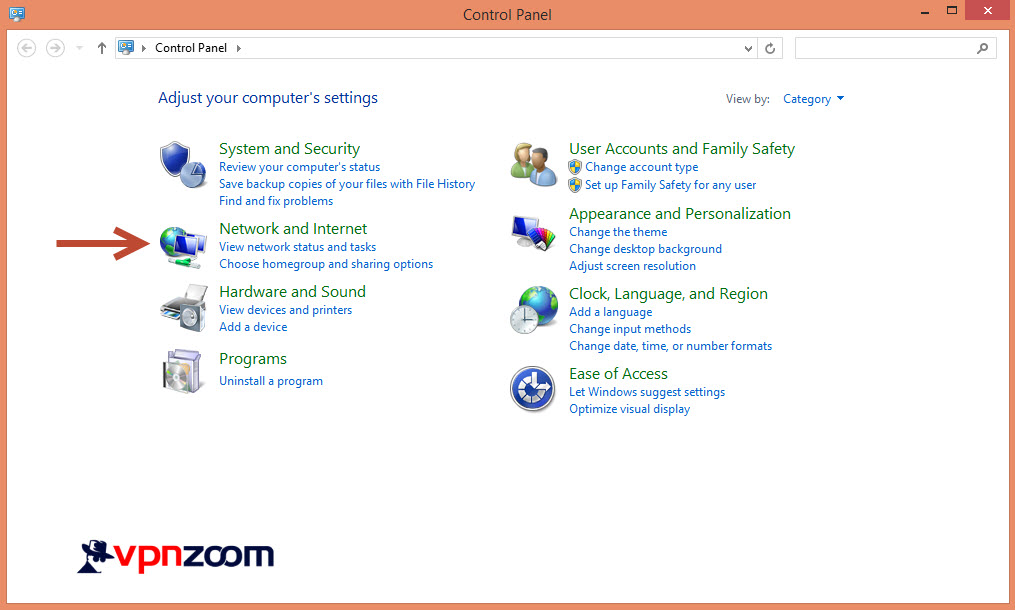
Step One: From the Windows 8 Start Menu type Control Panel and Windows will begin to search. Once the control panel icon appears click on it.
Step Two: Click on Network and Internet.
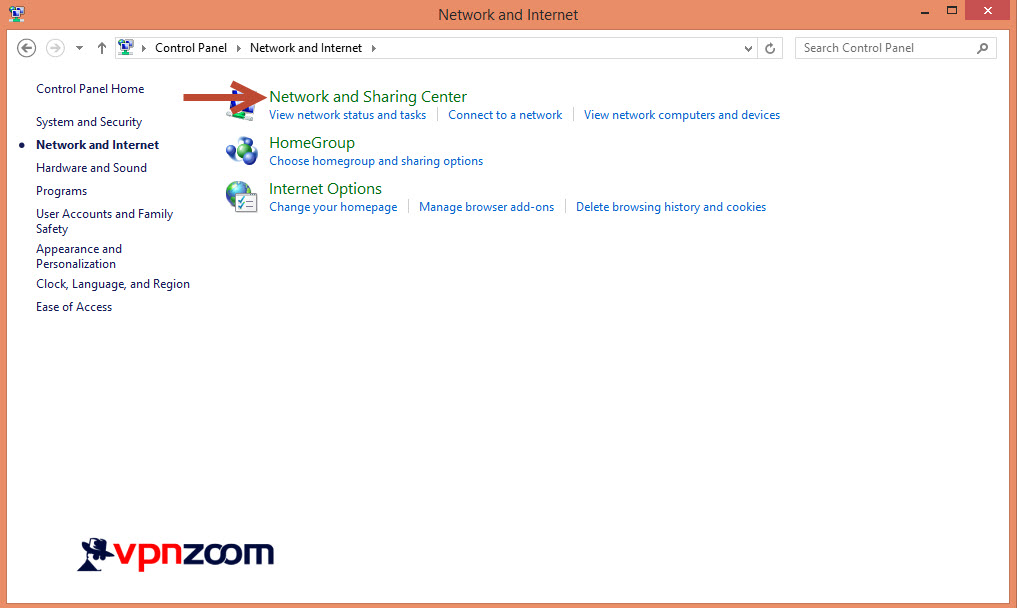
Step Three: Click on Network and Sharing Center
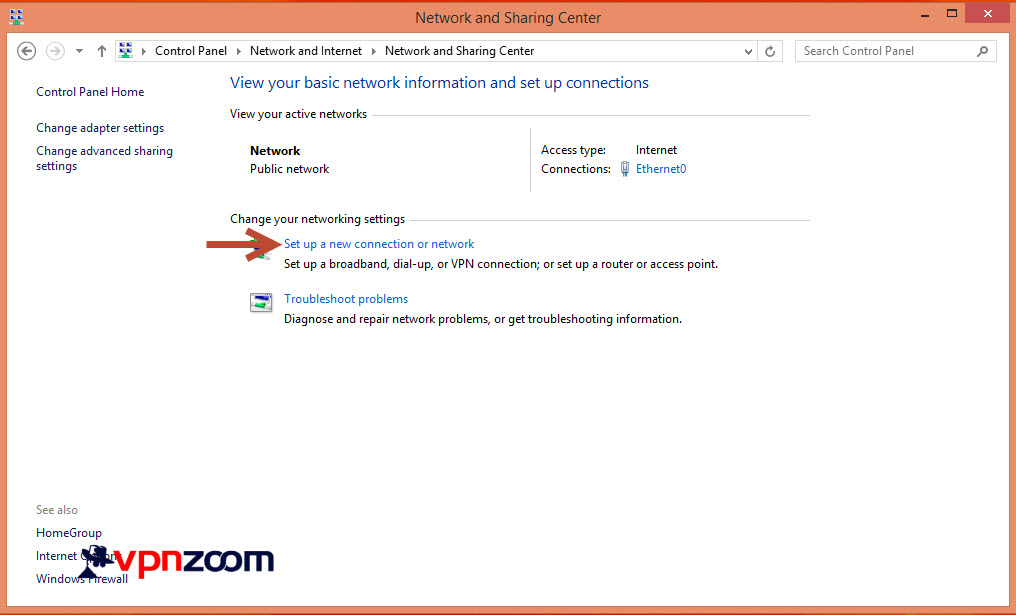
Step Four: Click on “Setup a new connection or network”.
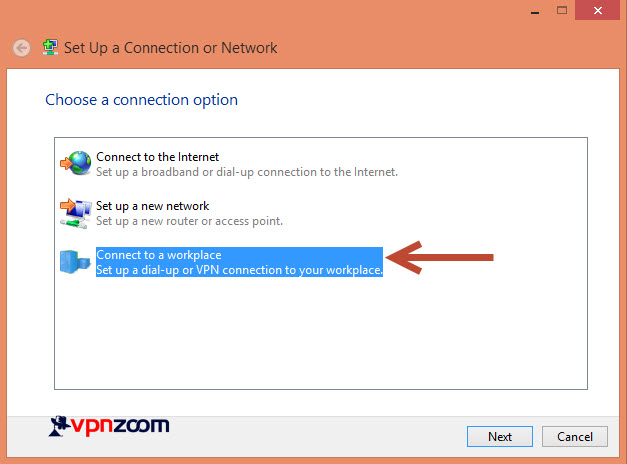
Step Five: Select “Connection to a workplace” and click next.
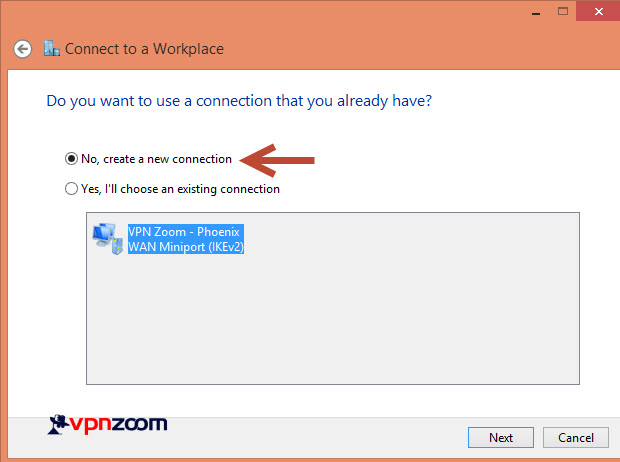
Step Six: Select “No, create a new connection” and click next.
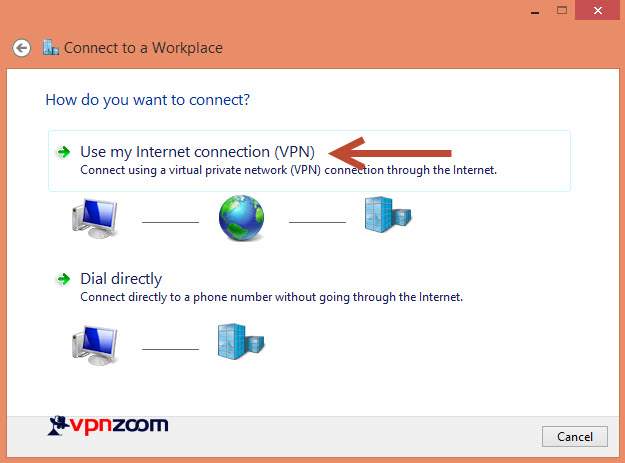
Step Seven: Select “Use my Internet connection (VPN).
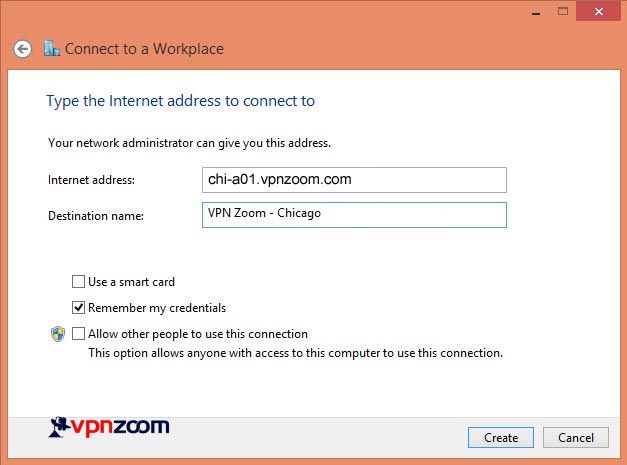
Step Eight: Enter a server address and a destination name that describes it. A complete list of our VPN servers can be viewed here.
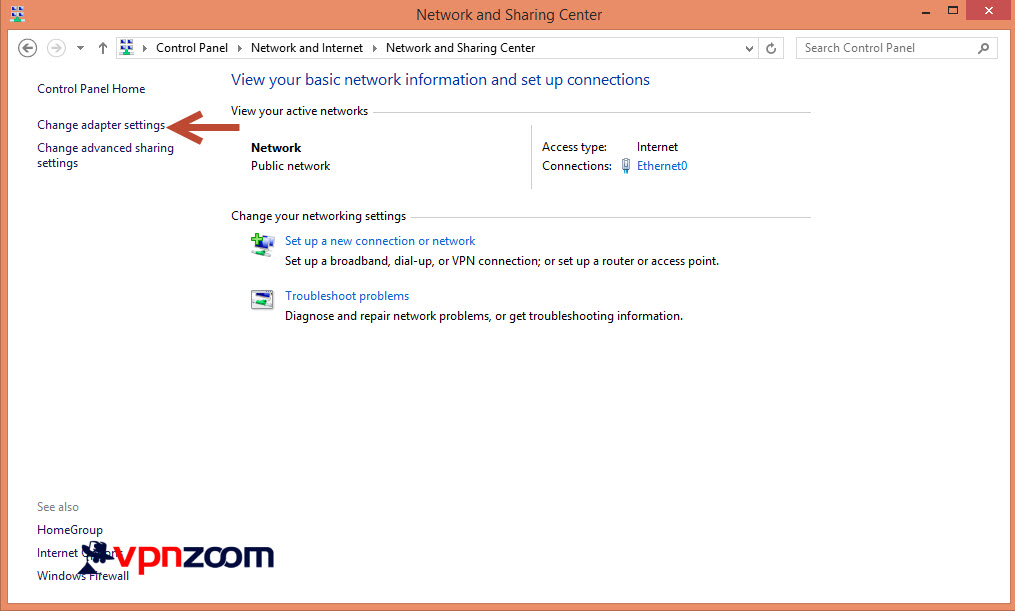
Step Nine: Now visit the “Network and Sharing Center” main page again and click on “Change adapter settings” in the left menu.
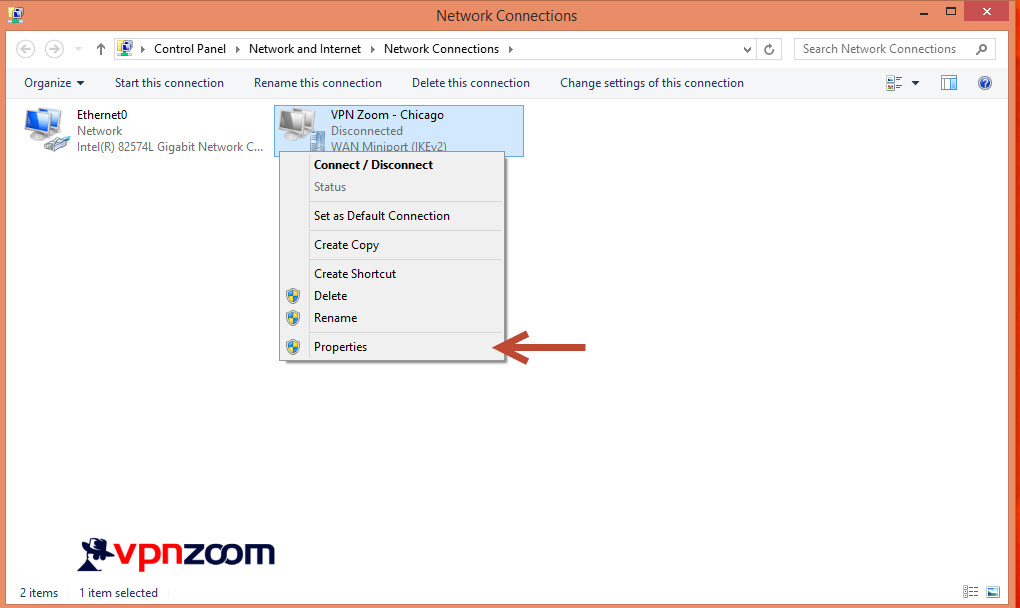
Step Ten: Locate the newly created VPN connection and right click it and choose “Properties”.
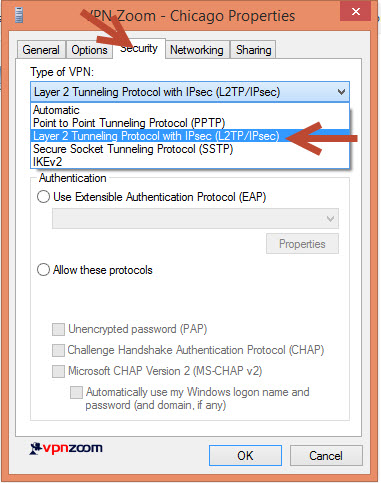
Step Eleven: Select the “Security” tab. In the area labeled “Type of VPN” click the drop down and choose “Layer 2 Tunneling Protocol with IPSec (L2TP). Click OK to save your settings.
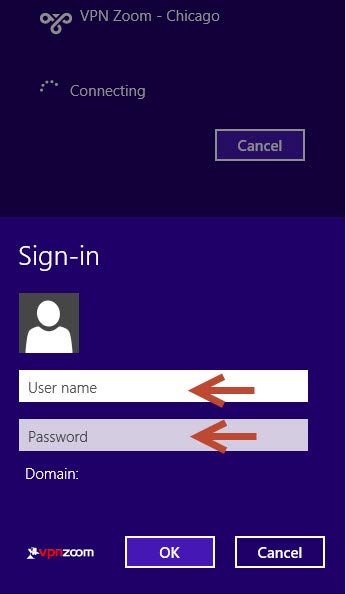
Step Twelve: Now find the new connection in the Windows 8 connection manager. Click the new VPN connection, enter your username and password and click OK. Your connection is now secured.


