Windows XP EZConnect Software
We recommend using the EZConnect Connection Manager for accessing our VPN service. If you’d like to manually configure Windows XP the following guide shows how to setup a L2TP VPN connection. If you have any questions about setup please contact our support team.
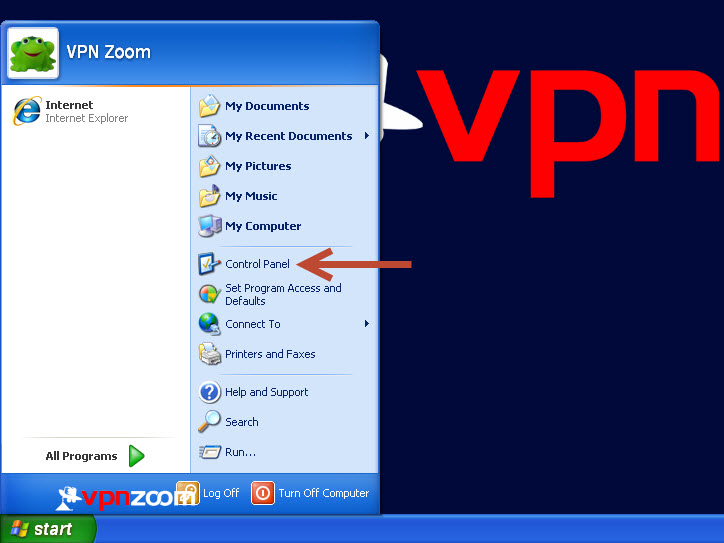
Step One: Click on the Windows Start button and select “Control Panel”.
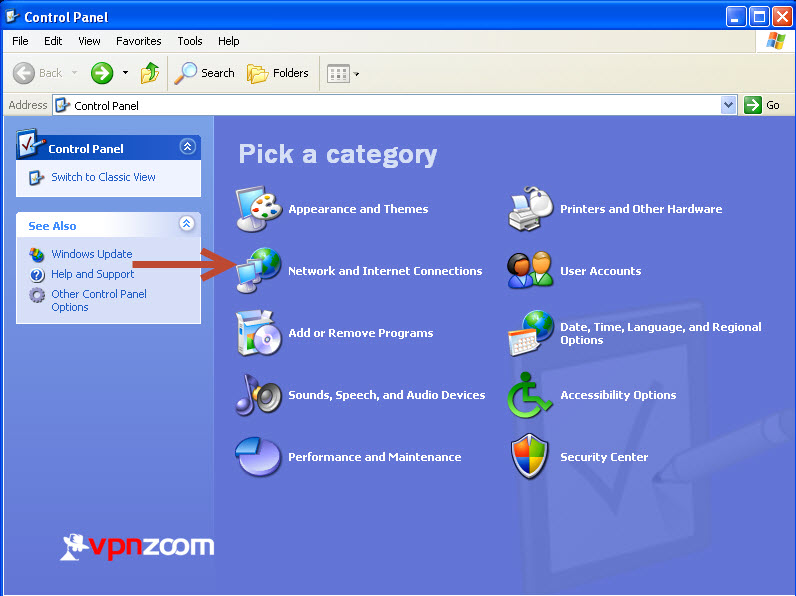
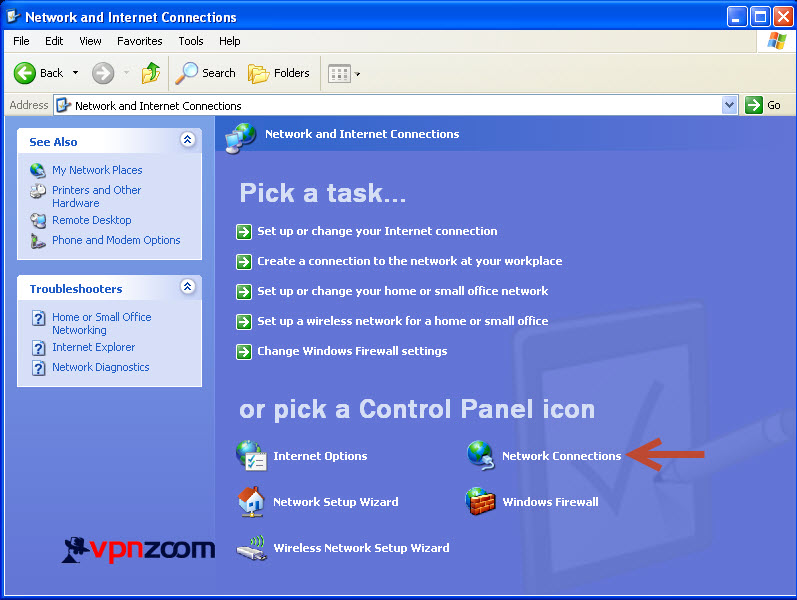
Step Two: Click on “Network and Internet Connections”.
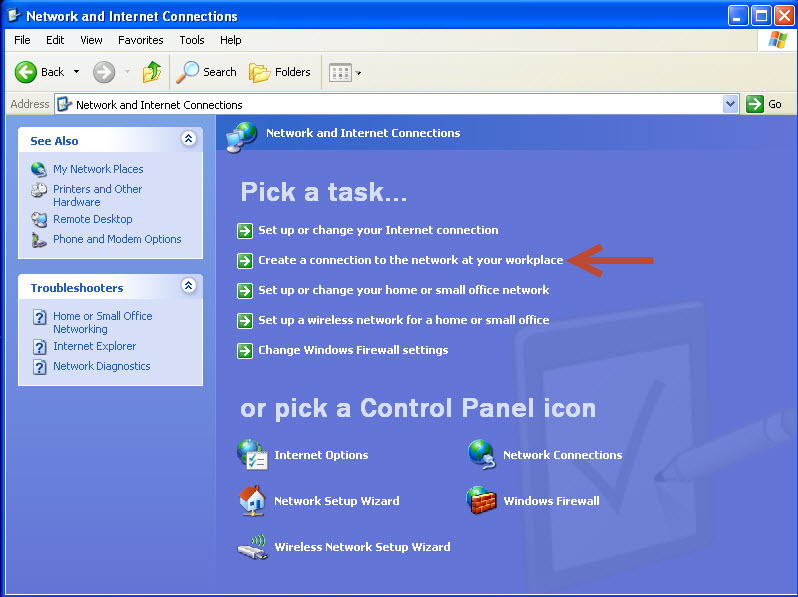
Step Three: Click on “Create a connection to the network at your workplace”.
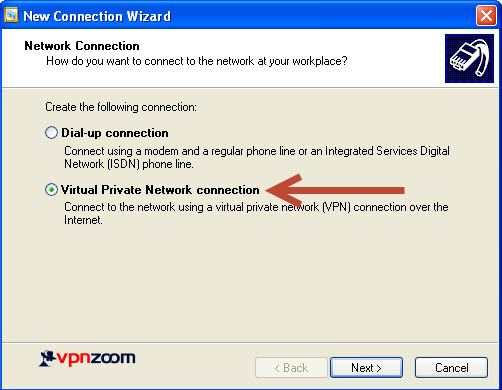
Step Four: Select “Virtual Private Network connection”.
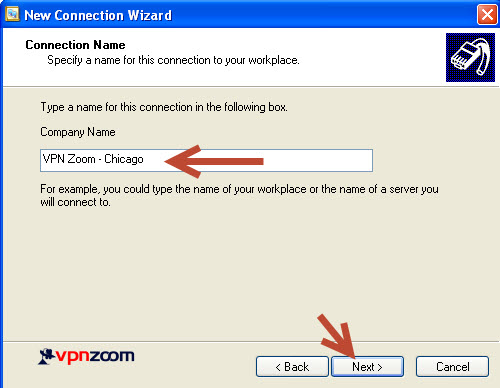
Step Five: Enter a description for the VPN connection so you can easily identify it in the operating system.
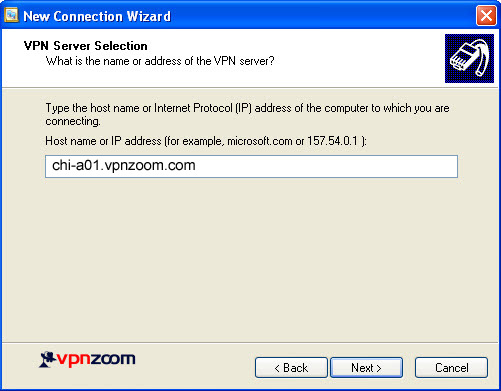
Step Six: Enter a server address. A complete list of our VPN servers can be viewed here.
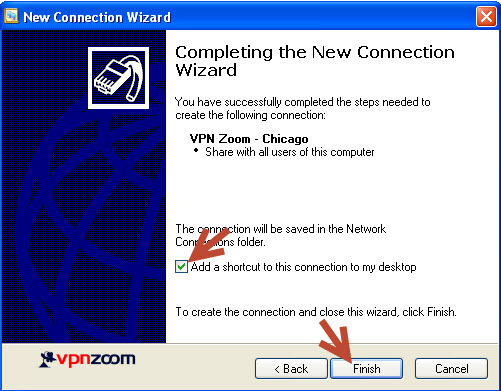
Step Seven: Click on “Finish”.
Step Eight: Click on “Network Connections” from the Network and Internet Connections control panel category.
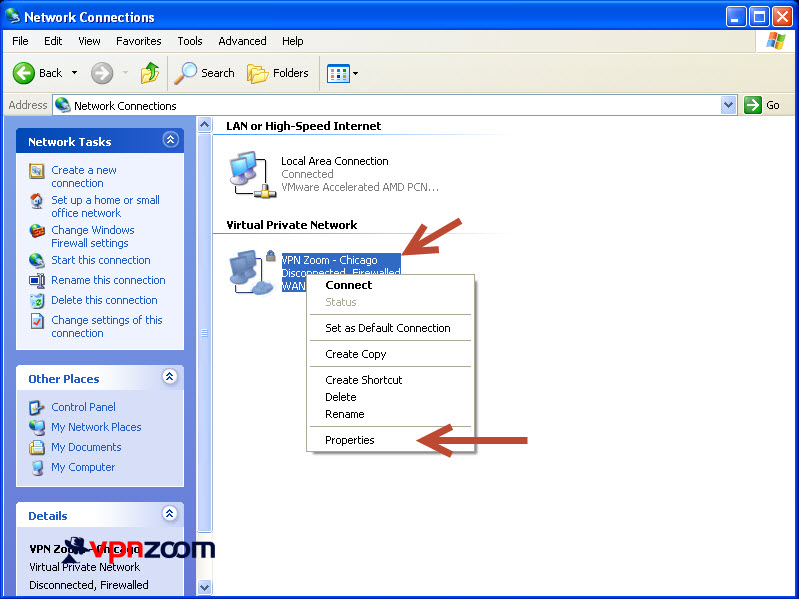
Step Nine: Locate the newly created VPN connection and right click it. Click on “Properties”.
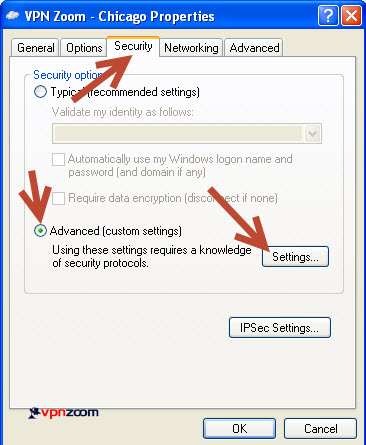
Step Ten: Click on the “Security” tab. Tick the “Advanced (custom settings)” radio button. Now click on “Settings”.
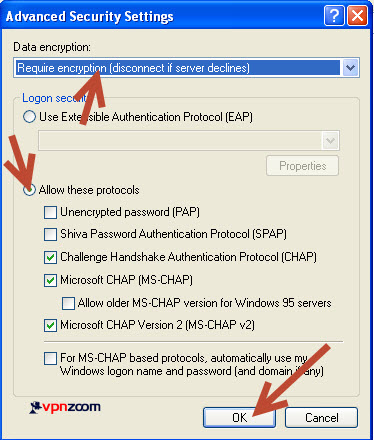
Step Eleven: In the “Data encryption” drop down menu choose “Require encryption (disconnect if server declines)”. Tick the “Allow these protocols” radio button and match the settings as shown in the image above. Now click OK.
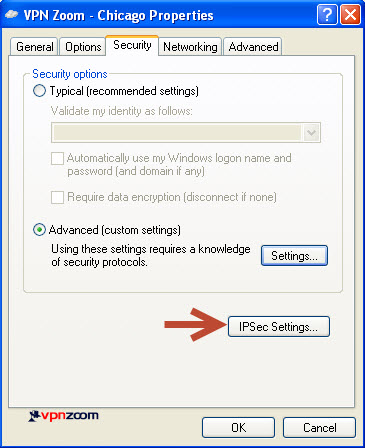
Step Twelve: Click on “IPSec Settings”.
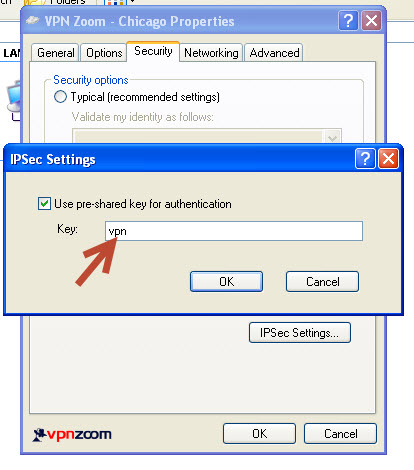
Step Thirteen: In the “Key” box enter vpn. Click OK.
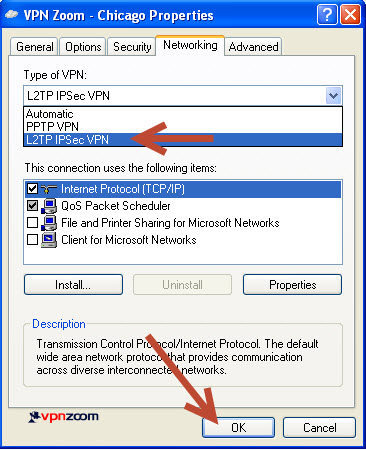
Step Fourteen: Now click on the “Networking” tab. Click the “Type of VPN” drop down menu and select “L2TP IPSec VPN”. Click OK.
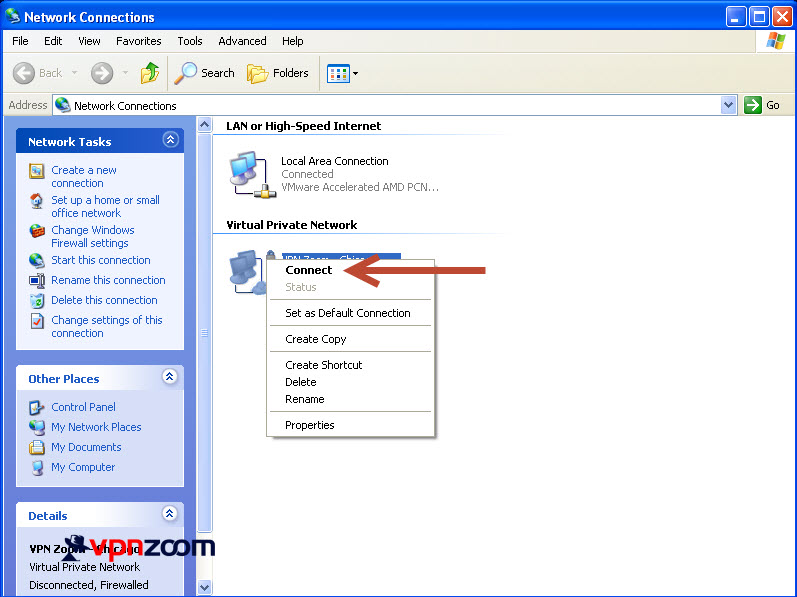
Step Fifteen: Now right click on the VPN Connection and choose “Connect”.
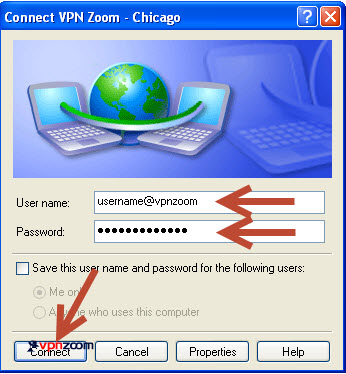
Step Sixteen: Enter your username and password. Note that all VPN Zoom usernames end with @vpnzoom (ex. username@vpnzoom). Click on “Connect”.
Step Seventeen: You are now connected to our secure VPN servers using L2TP. Browse the Internet anonymously.

